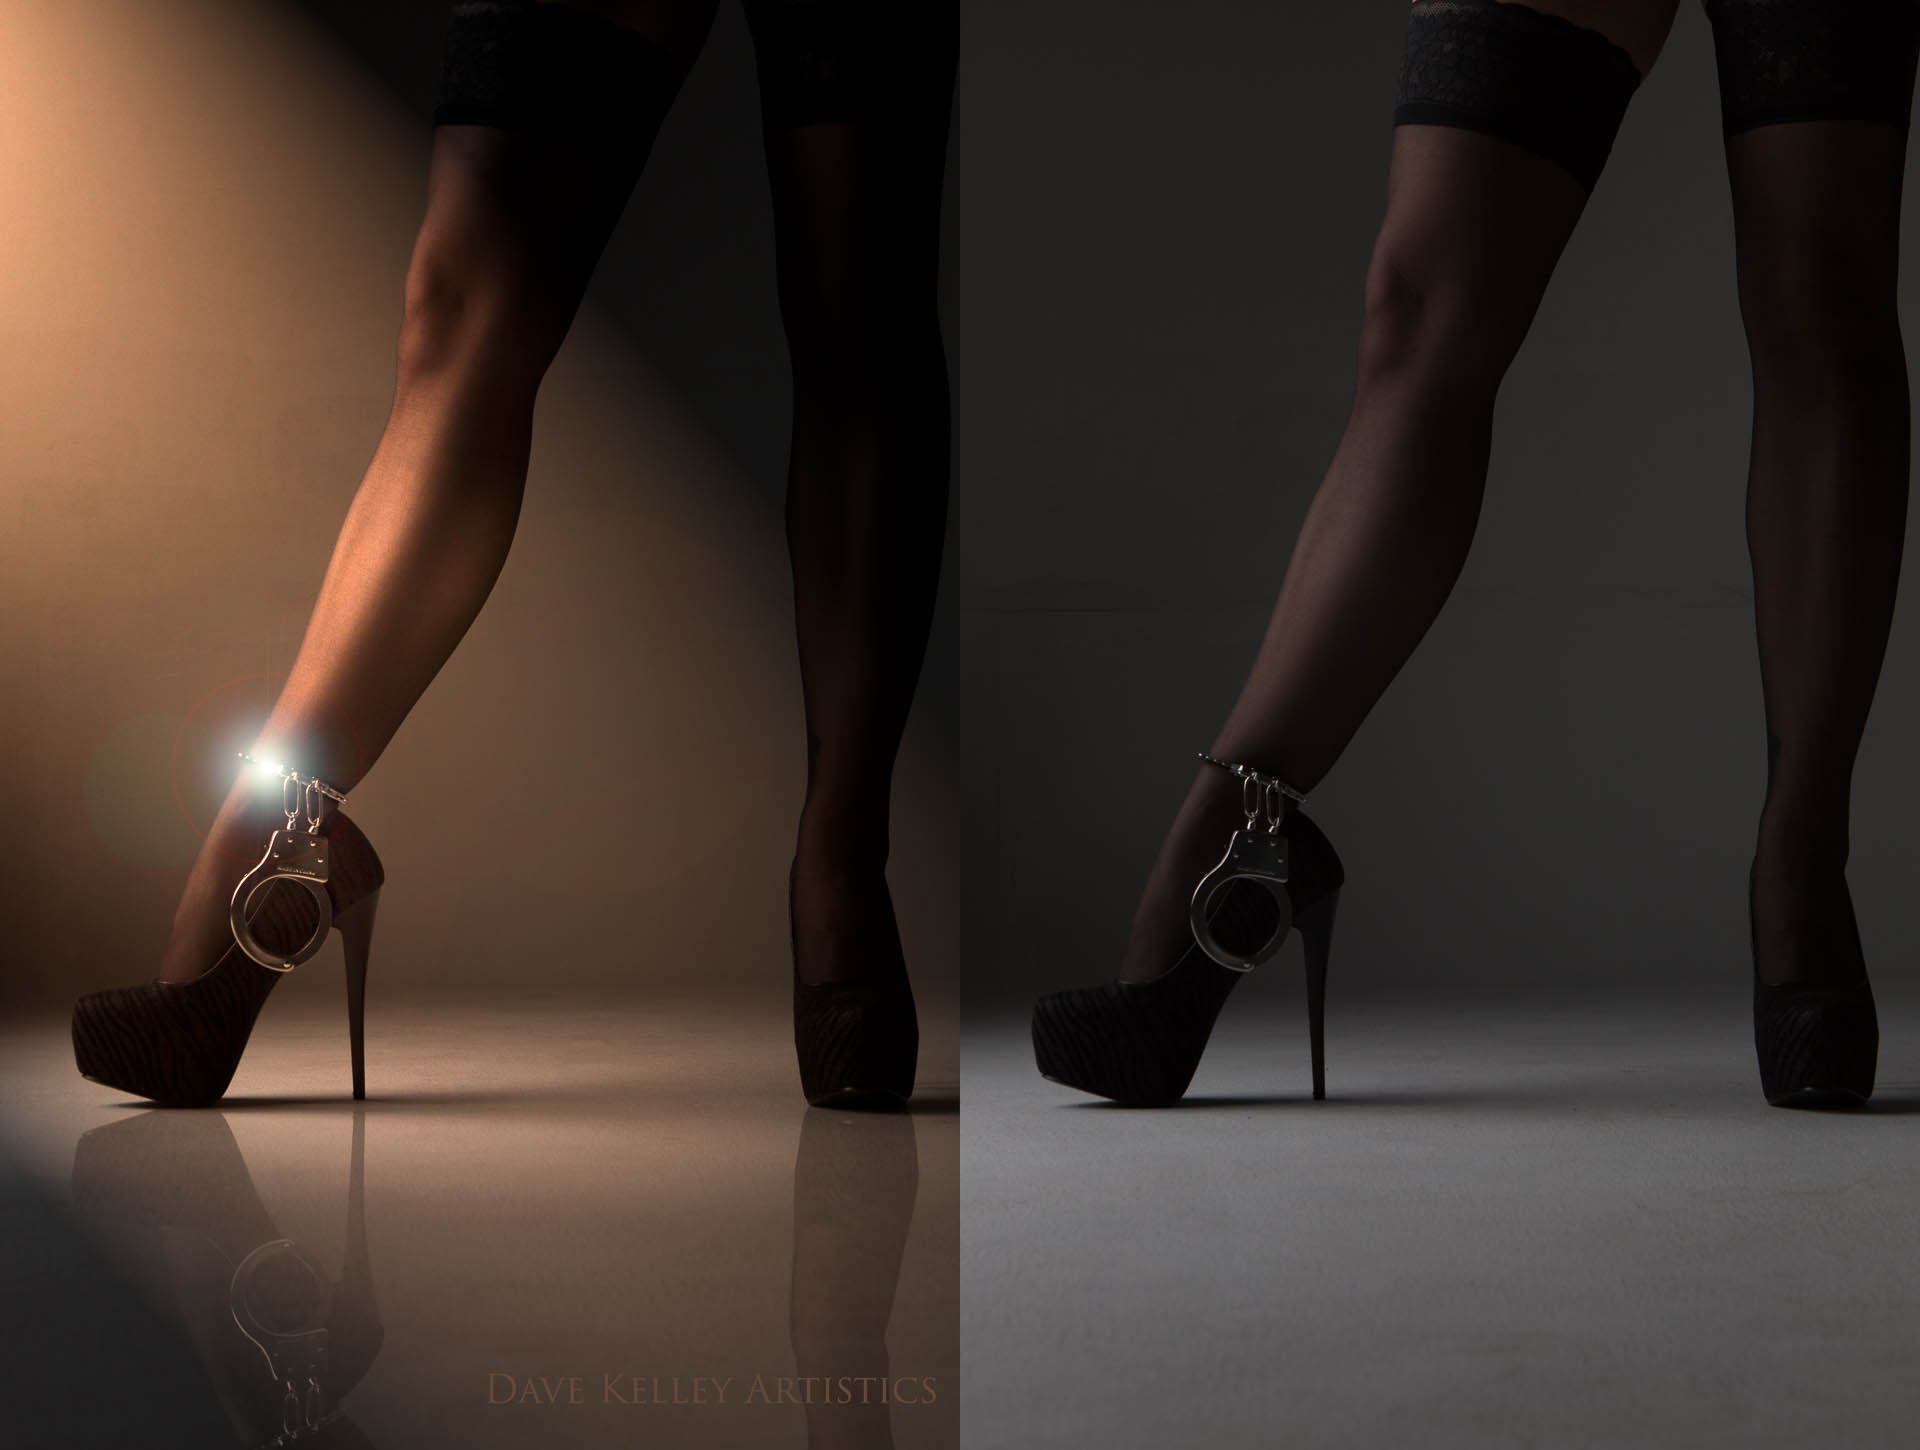
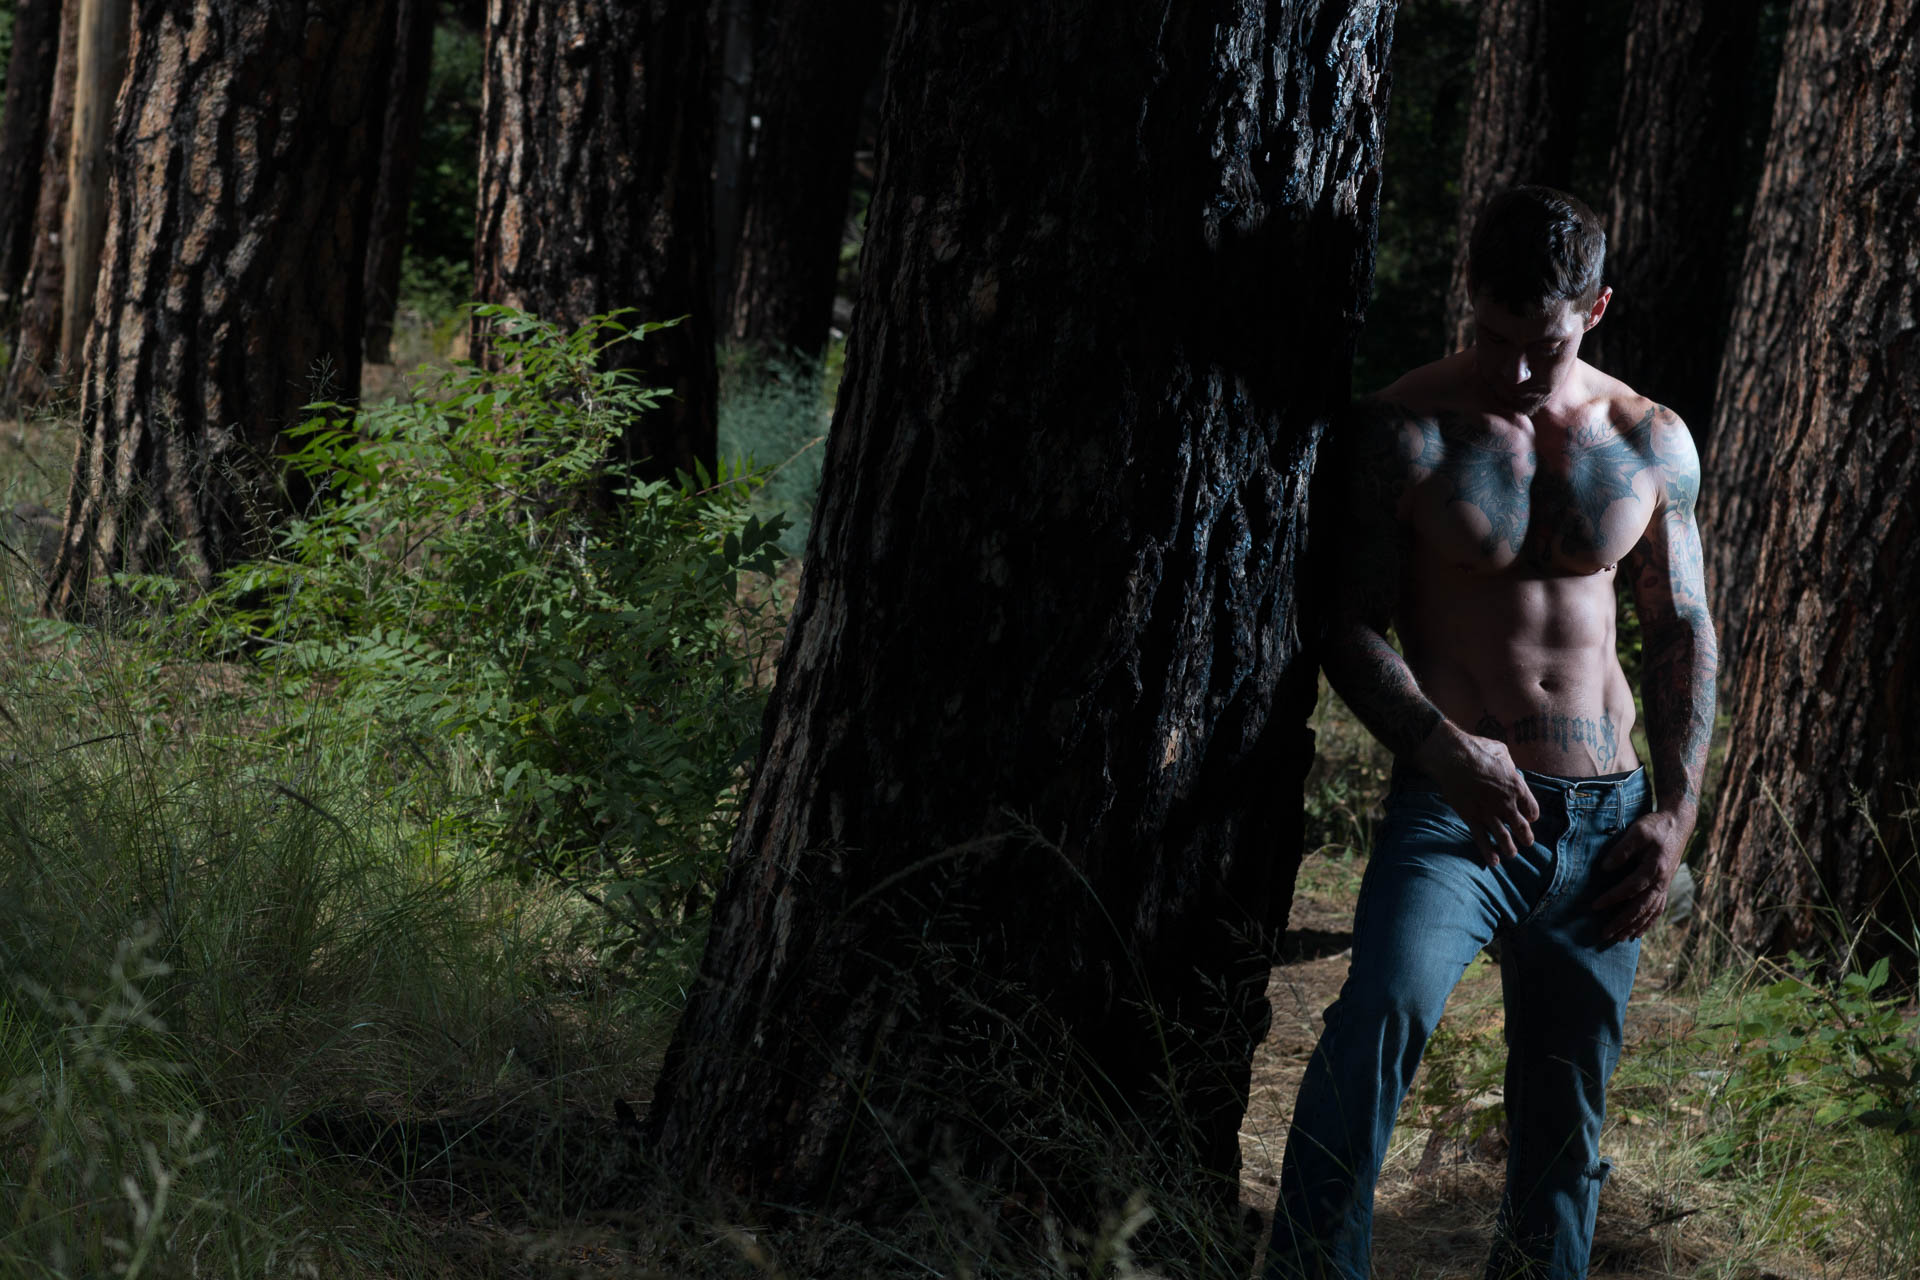
Beware - The art critic

From the first day I picked up a camera, I've had people who liked what I created and others who didn't.  I expected it and, at first, took everyone's critiquing to heart.  Of course, I think everyone knows pleasing everyone with art is impossible.  Some people will see the beauty, colors, lines, and 'feel' the art.  And some people have never seen art.  I feel bad for those people.  I equate art with happiness. 

I learned a few years ago how useless, to me anyway, critiquing was.  I'm talking about random others viewing my art.  There are professional artists with a trained eye who will tell you what would make an image better, not based on what they like or don't like, but from a technical point of view.  That's different and I respect those folks.

Gratuituse image - it is an art blog.

When I received my first unsolicited critiques I missed something important in what they said.  Typically it started out with, "I would do...", or "I don't like...".  They were honestly telling me what they wanted me to do to make it either like their art, or to change it so they would like it.  So, it wasn't a critique of the art, it was a commentary about what I should do to change it so THEY would like it.  Of course, I would get one person telling me it was to dark and another telling me it was to bright.  

Notice I haven't said the word 'constructive' with the word 'criticism'?  I really feel this word is simply used to somehow justify the judging of others work.  It seems to give some authority to it that just isn't there.  A form of political correctness.  There seems to be a lot of ways to mask judging these days.  Being offended is often used.  That basically is judging someone or something else based on the person's own sensibilities...or simply their need to feel superior.  Critiquing someone's art is often a form of judging or criticizing their work...or again, just trying to make themselves feel better about their own.

I've noticed something else lately.  There are some people out there who feel their critiquing of others is some 'right' and anyone who doesn't want to hear it is foolish for not wanting their advice.  On the extreme end of this group are those that will flat out tell you to take up gardening and stop trying because they don't see any promise in your work at all.  So far, 100% of the time, I haven't seen anything at all of note in their own work.  I hope they have a wonderful garden. 

I think the day someone asked me for a critique of their image, and I told them, was a turning point for me.  After telling them what I did, I felt bad because it didn't feel right somehow.  After giving it some thought I realized I did, indeed, tell them what I would have done to it to make it mine.  That is zero help to the artist.

So, bottom line, when someone asks me what I think of their art I always respond with, "Do you love it?!?"  Of course they do or they wouldn't have created it the way they did.  And do I say anything when I see something I don't like?  Hell no.  I don't see it as bad at all.  I see it as something that doesn't fit my parameters of what I happen to enjoy.  It sure as hell doesn't make it bad art.  Some people out there just can't seem to handle that all art isn't for everyone.  Doesn't make some of it bad just because they don't like it.

When someone gives me 'creative critique' today I thank them for their opinions and wish them a nice day.  As an artist I create for my own soul, my own heart.  I don't create for others.  I don't think it's possible to create the best you can and try to make it for others to like.  Put your passion to work, create until you love it and then it's done.  Trust your eye.

And yes, in a way I just judged some people for their actions.  But, no animals were harmed in the creating of this blog so I guess I'm okay.

Leave a comment below if you'd like.  Enlighted?  Agree?  Agree to disagree?

Lightroom exporting with custom title

I totally manage my workflow with Lightroom.  Unlike many however, I create a new catalog for each shoot.  My reason is fairly simple.  I want everything about that shoot to be in a single folder.  That includes the lightroom catalog files so anything I did to those files in Lightroom is still there in that catalog folder.  Of course, any edited files in Photoshop are saved in this folder too.  I don't have to worry about files that have been moved, drives filling up, or anything that might facilitate moving my files in something smaller than the folder the catalog is in.

I've never had that pesky 'original file missing' problem.  And when I go off site, like a trip or visit to our forest retreat, I can copy any shoot folders I want to edit and everything is together and good to go.

So, with that said, here's a solution to a problem I've had for years.  File names that tell me who and when the shoot was so I can ID the owner of the butt in a body scape.  Or know who the makeup or hair people were.

A few years ago Adobe was kind enough to add something in their 'custom file name' options of placing the name of the folder into the file name.  It worked great when the files imported into the root of the folder.  Since then they seem to have made it impossible to load a shoot into the root of the folder so the file name is simply the year.  Worthless feature now. (see last image on page)  So, the problem remained that I had all of these shoots I wanted to be able to export files from that didn't have any ID to tell me the who and when of a file.

Enter....KEYWORDS

I'd never given keywords much notice because it was a lot of work to put keywords on each file and I rarely searched my files anyhow.  

I noticed however, that in the custom file naming option on exporting that it could include a keyword of any file exported in the file name.  That, my friends, sounded like my answer.  So off I went investigating keywords.  Most important, being able to issue the same keywords to every file in mass.  Because I sure didn't want to do one at a time.

It turns out there are some quirky things about doing that in Lightroom.  To keyword all of them at once, or selected ones if that's what you need, is to put them in the 'grid view' first.  Then, select everything by doing the Command-A on a Mac or Command-A on a PC.  Once they are all selected you can select 'Keywording' in the Library menu.

Lightroom CC 2017

In this case you'll see I entered Ellie1117.  Since I selected all of them they all now have that keyword associated with them.

Now, we start our export and make some customization to the file names.  

Export screen

Find the area for 'File Naming' and check the box for 'Rename to:' and select Edit at the bottom.  This will let you determine what other items to place in your file name other than just the img1234.jpg.  When you select edit you'll get this...

Screenshot 2017-11-25 18.44.32.png

In the Metadata area select the first selection box and find Keywords and select it.  When you do, press 'Insert' and you'll see it adds it to the Example in the box above.  You can see a sample of the file name as well as blue boxes saying Keywords and Filename.  If they are not in this order just pick them up and move them around.  You can poke around and see other things you can add to the file name if you'd like.  Even camera settings are options here.

And that's it.  From this point forward Lightroom will default to including your keyword(s) in the file name.  All I have to do now after importing a shoot into a new catalog is set a single keyword named the same naming convention I named the catalog.  Even some days long shoots that end up in a bunch of dated folders will all export with the catalog name for that shoot.

If you keep all of your work in one catalog (mind boggling option to me) you can still select the images you want in the grid display and keyword them for each shoot in your catalog and get the same export feature of detailed names.  Might even be more helpful in some ways.

Enjoy and let me know how it works for you.

As for Adobe making it work and then breaking it....
 

Neener neener

Neener neener

The time it takes...

When I first picked up a camera I knew I had a lot to learn.  Oh, I knew my days would be filled with fStop, shutter speeds, and a lot of technical things.  Easy enough, I'm a geek.  I was fairly aimless and just took joy in the process of taking pictures.  Because of what I didn't know, I thought I was pretty darned good.  My pictures were bright and clean and the model was smiling.  I look at those images from 7 years ago today and, well, they are pretty...damned bad.

Little did I know.  Literally! 

My work from then, to me, is painful to look at today.  I'd say the first two years were nothing at all like what I create today.  Heck, I can't even take one from back then and edit it because the lighting is so poorly done in 99% of them.

Do I regret those first years?  Do I feel they were a waste of time?  Not in the least.  I don't cherish them and I certainly don't want to relive them.  I would, however, love to have known then what I know now.  It would have been far less painful as I went through the stages of growth and self doubt that came after those first couple years.  BUT, I am positive it was a growth cycle most of us must go through to become wonderful artists.  There is no shortcut!

Now, consider that I have been living and breathing Photoshop, Lightroom, Cameras, lighting, and being creative (or trying) full time for 7 years.  No job.  No kids.  A super understanding wife.  Nothing to concentrate on but my passion for photography.

What I'm hoping to get across in this chapter of my blog is that being good, I mean really good, takes a long time.  And there are no shortcuts.  Oh yeah, every once in a  while there is a natural that just picks up a camera and everything they take is golden perfect.  I've never met one because they are rare.  I'm not one and it's a good chance you aren't either.

Yes, the chances are, you will get to that point of taking beautiful and breath taking pictures.  That's the good part, we can all do it but not be a natural at it.  It will eventually feel natural.  No one has ever picked up a bat for the first time and played in the world series even a year later.  It takes time.

Knowing what you have ahead of you can help ease the frustrations a bit and provide some comfort that what you are going through is the same as everyone else.  Although, what frustration you do go through is actually a part of that growth...just remember that.

What I didn't know.

I had no idea what style was.  I knew I had seen some work from some outstanding photographers but I didn't know that I thought they were great because of their style.  

I learned at about the 2 year mark what it meant to have something that was me.  Something that made my pictures look like, well, MY pictures.  I started renting out my studio and helping people with the lights.  By then I had some favorite lighting schemes I used fairly often.  I didn't understand that this was the beginning of my own style.  That light bulb was just beginning to glow. (pun intended)  After the people posted images they had taken where I had helped with the lighting, I noticed the images looked a lot like what I would have taken.  Because the lighting was my schemes.  Wait, what?  There was a way I could have my own look?  My own style?  

So, the light got brighter as I thought about the next steps.  Of course, I'd been going to seminars, scanning the net for amazing work by others for inspiration, and, of course, hundreds of hours retouching with Photoshop.  That has turned into thousands of hours over seven years.

It is important to understand there is no 'destination'.  Of course you will be moving and your work changing constantly.  But, even when you might feel like you are 'there', there will be something else to change up your style to another level.  A new technique learned.  A new tool added to your workflow.  Or a change in your personal life.  Changes come from a lot of places.  The moving slows down some after a while, but by the time you are feeling very good about your work, and that people are recognizing your style, you will have an irresistable  urge to see how far you can go with it.  Then it gets to be more fun.

Where does style come from?

As you grow with your photography, you'll find you need to consider yourself more an artist than a photographer.  You only use the camera and lights and gizmos to help you create that image.  First step, tell people you are an artist.

All your life you have been exposed to art and photos that you either loved or didn't.  Each one had at least a tiny affect on what you love.  What your mind's eye loves.  And of course there is no right or wrong in what you like.  Expose yourself to everything you can, even collecting up images you'd like to have around for inspiration and hold as goals to create like those.

Take a few million images.  Learn about lighting.  Challenge yourself with images you like and try to light up a shoot like those.  Learn to make the light do your bidding.  Eventually it becomes like muscle memory.  You will move the lights and KNOW exactly how it will look.  At that point you are a master of your light.  Oh, and the sun counts as a light.  Have fun moving that one.

Then edit.  Edit.  Edit more.  Learn your tools well and use them often.  Just like the lighting, you will start to see what the image will look like in your mind and then you will go though the steps to make it look like that.  And yep, it takes thousands and thousands of images coming across your screen for edit before every one you work on comes out amazing.  And, in your style.

As you are going through this whole process there will be peeks and troughs of creativity.  Some days everything looks great.  Lighting is spot on.  Editing is looking wonderful.  Then you hit a low point where nothing you do seems to be working well and you will have a lot of doubt.  Is this it?  Is this the best I can do?

Nope!

I started looking forward to those low times.  They didn't signal that I was at the end of some journey and this was it.  That I couldn't do any better.  Nope!  It was a sign that something new was coming and my art was about to take a leap forward.  Not always a big leap.  Actually, the leaps get smaller as you grow, but are just as important and noticeable as they accumulate. 

It all takes time

When I hear someone, typically someone in their teens or 20's, grab up a camera and expect to take award winning images within a few weeks, I just shake my head.  Today so much is based on instant gratification.  Some things don't work that way.  The best things.  Things that take time to learn and develop are far more gratifying as you progress.  The very best things are things that grow to be who you are.  That makes us all unique. 

That 'style' I was talking about is a mixture of everything you have experianced, everyone you have known, love lost and found, art you loved as well as art you hated.  Your minds eye when it comes to art is a mixture of everything about you up to this point in time.  What you are learning as an artist is how to apply those experiances and that will be your style.

Give your style time to grow.  Don't look for reasons you aren't there yet.  It's easy to think the next new camera body will make your work pop.  It won't.  That seminar will rock your work.  It won't.  That new filter will be amazing.  It won't be.  Nothing will until you have developed that mind's eye and then all of the skills to create what that eye sees.  A little of all of those will become part of your style as tools to help you create art you will love.

Now you know what's ahead.  And if you've been doing this full time for years and years and have your style down you'll probably nod and think, yep.  If you are fairly new it might be 'Oh crap!' but stick with it.  It's well worth the effort.

Oh, and when do you know you are there?  After all, you better be creating things you totally love.  It's as close as the people who look at your work.  The complements.  The people who ask your rate.  The creations on magazine and book covers and hanging on walls.  That tells you someone out there sees something special in your work.  At that point you will find a certain feeling of joy in each image and an ease in creating it.  Each will be a part of you.  THAT is when you know you are there.  You will look and feel like it is all just natural.


Comfort un-zoned

The best way to kill creativity is through repetition.  Doing the same thing day after day, turns it into a habit, and habits are simply things we do because, well, that's what we do.  We get into these habits because they become comfortable.  You know the results are okay.  Often the first time you do it it is very impressive and you love it.  That felt good, lets so more of that.  It soon looses that new car smell.

As an artist, and I assume everyone reading my blogs are artists and not just snap shot photographers, we have to try new things to grow and become even better than we were a year ago.  Or, lets bring it in even closer.  Better than we were yesterday.  An artist has both skills and talent.  You can't really create wonderful work without both.  The talent comes mainly from your ability to see and enjoy art.  All art that you have ever seen, as well as life experiences, will mold your artistic talent.  Skill is actually easier to quantify because it is physical instead of emotional for the most part.  

In previous blogs I've mentioned that some artists MUST stay with the same look with their art.  They found an audience that pays for their work and they expect the same style in all of it.  If you are one of those, well, you probably aren't reading MY blogs anyhow.  But congrats!  If you are in this and trying to make money, a stable marketable style is the gold at the end of the rainbow.

Back to the habit.  The problem with creating your art and finding something comfortable is that you will loose the joy of creation.  That feeling you get when you do something new and sit back and 'wow' yourself.  That is why we do this.  Quantity isn't important, it's the quality.  We shouldn't be creating our work because we have to.  That's habit.  We create to bring to life a new window into our own artistic mind.

This brings us to a way to solve the mundane and bring excitement back into your art.               At least how I and several of my friends keep it fresh.

The above is a sample of what I do before every shoot.  I have thousands of images that others have posted on Facebook, 500px, or a host of other places on the net.  Knowing the shape and comfort level of the model, the location, or studio, hair color, etc., I can pick out images that give me a starting point to create my own images with that model.  In the beginning I thought this was cheating a bit because they weren't original ideas.  I found out later that artists use other paintings, drawings, and photographs for their inspiration often.  It's how it's done by the most creative.

A very large percentage of the time the images are there to remind me of another idea it gave me.  Like a lighting scheme I want to try.  I never try to duplicate an image exactly as I see it in the inspiration photos.

Now, back to the point of not getting into habits that kill creativity.  If I brought models in, sat them on a chair, used the same light each time, and took the one picture, that would get fairly redundant and boring to me as an artist in short order.  They may look wonderful to each model, or even those who view them.  Sean Archer is an amazing photographer and much of his work is the same, but his talent is bringing out something special about each person's face.  That makes seemingly redundant images all very interesting to look at.  So the variation in the images can be subtle.  

This is an image by Phillip Richie that inspired this blog.  Phillip has been an inspiration to me since the day I picked up a camera and remains so.  He's one of those most imaginative artists I've followed.  Click on this image to s…

This is an image by Phillip Richie that inspired this blog.  Phillip has been an inspiration to me since the day I picked up a camera and remains so.  He's one of those most imaginative artists I've followed.  Click on this image to see more of his work and follow him.

Using inspiration should help mix up your style a little, help fine tune it.  Remember, it's other art that you have seen and life experience that forms your artistic eye and personal style.  What better way to feed that is to spend time looking at other's art, collecting it up for inspiration, and then pushing your skills by seeing how you would do the same kind of art.

The best part is that every new thing you try teaches you something, often subconsciously.  So it all helps.  Even if you do something that doesn't tickle your artistic heart strings, it will change your skills and art just a tiny bit.

Mix it up, heat it up, spice it up.  Get creative and watch for those pesky habits.


The rules

Coming up on my 8th year as an artist, and my 64th year as a human, I have learned a lot about people.  In most cases, they are kind, thoughtful, generous, and many have become good friends.

There are those few who are pretty self centered and in their own world.  Those with a total lack of respect for other's time.  These people are the ones who have generated a good number of the rules I have, over time, created.  Up to this point, they have been in my head.  Today I will put them here for all to see.  

Why share these rules?  So I can point them out to those that break them.  A form of hitting them on the nose with a rolled up newspaper when they have shit on the carpet.  I doubt they will learn from them, but being an old guy who doesn't put up with shit, on the carpet or in life, I have to give it a try.  Some may judge me as an ass and egotistical.  Maybe I am, but I don't care what others think of me.  It's not my business.  So there!  Neener, neener!

Gratuitous image.  it is an art blog after all.

So, without further babbling, here they are.  The list may continue to grow over time of course.

1. I never ask twice.  When I ask if someone will do a certain type of posing for me, such as implied or nude, their answer is in stone.  And I do mean stone.  If that model then tells me he or she has changed their mind...sorry, but no.  Why?  If I go ahead and shoot someone in a manner they previously didn't want to do, they could and have, just as easily, changed they mind and asked me to remove all of our work.  That's hours and hours of my time wasted.

2. Hook ups by models.  This is when I shoot a couple for a book cover, and one of them hits on the other.  I know, right?  This shouldn't be any of my business.  When I spend hours editing images and hours doing the shoot, and I'm trying to market our work...and then get a message from one of them saying they broke up and they want me to pull all of our material.  Yeah, that sucks big time.  This is a professional operation and I value everyone's time, not just mine.  So yeah, I make it known I don't want to see any 'hook ups' and if it happens, well, no, I'm not going to waste our work.  It will still get posted and sold.  And yup, we won't be shooting again.

3. I won't shoot models who are living with photographers.  That sounds a little high and mighty and judgemental of me, but it's not.  I don't care about their relationship or marital status.  Not my business.  But I have learned that if a model wakes up next to a photographer it changes everything about how they respond to my camera and I.  This one I can't put my finger on exactly, it just doesn't work well for me.  I have a few exceptions.  In all of them, they are either friends or we shot long before they started with their new relationship and our established creative relationship seems to stay functional.

4. No shows.  If we schedule a time and day and you don't show up, I don't care what the excuse was.  You have my number and you could have let me know.  If you care that little about my time, well, I'd be a fool to give you more to disrespect.

5. I only book with the model directly.  I certainly don't go through agencies.  Nothing I shoot is good for an agency portfolio.  And there has never been an exception that this hasn't bit me on the rump.  Every time!!  So no middle men (or women) when I book or communicate.

So, until I think of other times I ended up with bite marks on my ass, and reasons I got them, that's the rules.  Having them written down is helpful for an old guy like me.  

And, in case you were wondering, yes, this afternoon I had a shoot set up that broke THREE, count them, THREE! of my rules.  Messaged the guy after 30 minutes late and he said 'sorry, baby sitter flaked'.  I asked why he didn't think to message me and let me know, and I get another 'sorry'.  Yep, wasted the whole day.  Well, other than getting this blog done finally.

Have your own rules, written or not.  It may keep the bit marks on your ass to a minimum.

Just imagine!

When we enter the world of photography it is full of technical things we need to learn.  Settings on the cameras can seem confusing for a while but is easily mastered over time.  Lighting systems and all of the variations of those.  Learning what the difference is between hard light and soft, and the ways to direct, combine, and reflect the light.  What seems overwhelming at first becomes easy.  Like pretty much anything else.  It takes effort and thousands of images to get there.

Those are very important to doing any kind of photography.  Eventually, it will get to a point where you will not even think about what you are doing with the camera and lights...it will just come naturally to you.  Everyone is different in this respect of course.  When someone asks me what I have my camera set at or the lights I rarely have a clue.  I have to look and see where my mind had put things to get what I want.  Kinda' like jumping in a car and driving off.  You don't think about all of the things you need to do to get there.

This is all important...but there is something else that makes it really work.

I'm always talking about photography as my art.  I'm an artist and in my blogs I assume you are or want to be too.  If you are a perfectionist and want to take images that are exactly like they look in real life then I'm sure I drive you nuts. 

Art is what I see in my head, not my eyes.

So, this brings me to the part a lot of people miss.  Imagination.

Most of my shoots involve a model or models.  Lately I've done more landscape and it still takes some imagination.  So it works in every area of photography.

When I plan a shoot I don't plan down to the last detail.  For me, that stifles the creativity that I feel makes a session work.  Being light on my feet and keeping my eyes and mind open.  Watch, listen, and imagine what the possibilities are.  Remember that our creative 'eye' is actually calling on everything we've ever seen that we liked, or didn't like.  Not specific things of course.  But a bit like a recipe...you can't always taste individual ingredients, but without them it tastes different.

Take your time, and don't hesitate to change the lighting or direct the model or makeup and hair stylists to bring your vision together.  Especially lights.  Those are probably the biggest element of creating a certain image and you control those.  Even if you are out in natural light, there are endless options to have reflections, shadows, shade, and (gasp) direct sunlight to create what you see in your mind.

Don't hesitate to cheat.  Well, I call it cheating but it is common.  Before a shoot I pick out a couple dozen images from the thousands I've downloaded that inspired me in some way.  I pick them out based on the look of the model and any known talents the MUA might have.  Interestingly, I very rarely want to try to duplicate the image.  Not that this is even possible.  Nope, the images are picked because of some lighting I liked, or to remind me to do one thing or another.  In many cases the end result isn't anything even close to the inspiration shot.  Much like painters use 'reference' images to help them see how muscles, ears, and hands might look, I use 'inspiration' images to remind me how some lighting or poses might look.  It keeps the shoot moving forward as we move from one idea to the next.

Moving at a good pace is important during a shoot.  No breaks.  Heck, I've found models that need smoke breaks tend to dent my creative zone a bit.  That five minutes of inactivity busts the flow.  

The result of a creative shoot, with a heavy amount of imaginative sets, is an exhausted brain.  For me, I get to a point in a shoot where my mind just stops...it's exhausted and that's when we end the shoot.  Nothing after that works.  I just run out of anything to try.  This is typically 3-5 hours in and many sets later so it's not a bad thing.  Great creativity only works in spurts.

So, use your imagination.  Write down that idea you just had in the shower.  My favorite place it seems, to have interesting ideas pop in my head.  Pay attention to cinematography in movies and TV shows you watch.  Study other artists styles and figure out what you love and what you don't, and think about why.  This all gets your mind thinking creatively.  It's an endless pursuit because we are always growing and changing.

Just imagine!

Wolf at f11

And by 'wolf' I mean a photographer who isn't in it for the photography.  Or not entirely.

This blog is mostly for models, or people who want to model.  It's not just for the ladies either.  Male models need to understand the risks too.  Take this and add it to the street smarts collection of things you don't want to be naive about.

There was a time when you could look at a photographer's portfolio and pretty easily tell their motives for being a photographer.  If they didn't have one, that told you a LOT.  If they had one and it was nothing but a collection of bad images, that also gave a good indication that it was not a good idea to work with them.

I'm sure what I'm about to add to this isn't new.  It's just new to me.  I hadn't noticed this until recently...and that's not unusual.  Shiny objects and squirrels tend to rule my attention.

I've noticed that there are some fairly good, to VERY good photographers out there that you would typically think would be safe to work with.  By safe, I mean wouldn't want you to get naked for any reason other than for some wonderful artistic images.   

From what I can tell today, the measure of someone's portfolio to determine if they are professionals is simply the first step.  But not the only step.  You need to get some referrals.  And not just one...two or three. Trust me, I have no problem with a perspective model checking my background before we shoot.  I actually expect it and encourage it.  No exceptions!

Social media has given us research capabilities that seem limitless, and often right in your pocket.  Use it. Reach out to a few of the models that the photographer has in their portfolio.  Ask them straight out how the shoot went.  Were they comfortable?  And specifically, were they pressured to do anything they were not comfortable with.

Also make sure you communicate with the photographer about what your comfort levels are.  If you do or don't do implied nude or nude, that needs to be conversed so that everyone is clear.  

Don't discount your gut feelings.  If something about the photographer just doesn't feel right, either investigate further, or say 'NEXT' and move on to the next photographer.

As a photographer I'm not nearly as concerned about the way a shoot will go.  Believe it or not, there are still times I will call off a shoot before it's even planned if I have a gut feeling that something is amiss.  It's rare, but it happens.

So, watch out for your own safety.  Especially the ladies out there!  

Light. Naturally.

There are two phrases I hear fairly often.  "I'm afraid of natural light" and "I just don't understand studio lighting".  Unless all of your work is shot in the dark, you are comfortable with at least one or the other.  Both is great.  As with anything else, the more you really understand every aspect of something, the better you are at it all.  Light is light.  Our main job as photographers/artists is to harness the light to do our bidding.

So let's look at three example of light and how I used it.

1/100 sec @ f2.8, ISO 250 using a 24-70 L lens at 46mm

You'll see the camera settings under each image.  This is just to satisfy your curiosity.  Don't make note and expect the same settings in your own unique situation.  If the sun was behind a cloud at the time I took this, a few minutes later I'd have to change something to compensate for more light as the cloud moved.  You just have to learn over time and practice to know what settings on your camera will give you what look.  It needs to become an extension of your minds eye to capture images.  I don't get technical with the composition of an image.  Other than the light meter built into the camera, I simply adjust everything else to get what I want knowing what settings will give me that look...from experience.  That's not to say you shouldn't understand the relationships between shutter speed, aperture, and ISO.  But, there are only three and they are pretty basic.  Knowing them is one thing.  Knowing what combination will give you whatever look you are after is another.

In the shot above I had Marcela placed next to the window and opened it only to give a fresh air feel to the shot.  The light was soft because the sun was on the south side of the home and this shot is looking north.  That lights up the background and helps blow it out.  I don't want people focusing on what species of cactus that is back there.  That's not the point of a shot.  Most of my work has a lot of bokeh in it because I use that to bring the eyes to the one thing that's in focus.  In this case, Marcela's beauty.

I did add some dodge to her to enhance the light reflecting off the bed.  This allowed me to give her back her shape in the shadows.

1/200 sec @ f2.2, ISO 100  85mm II prime

Here we went outside and I put the high sun at her back.  I don't believe in the use of reflectors myself.  It just reflects the sun right back into the model's eyes giving me the squint I'm avoiding by facing her away from the sun in the first place.  Her contrast is softer and yet more detailed by not having the blast of full sun on her.  If it was cloudy we could shoot from any direction pretty much.

So, we are looking at a speed of 200 and an ISO of 100 so basically we are running fairly slow for outdoors during midday.  The fStop is very low so I could blend the home behind her in the bokeh.  Another important use of the bokeh here is the branches directly behind her are soft and blurred so her features stand out.  Yet the branches in the same focus plane to the left are sharp and further enhance the softness that she has.  So we are using the bokeh to define her in the image by using the background effectively.

Again, a little dodging on her legs and hair and face to bring out shape and bring her face out of the shadow of her hair is used.  Black stockings always draw me to dodging because it just looks amazing.

1/80 sec @ f2.8, ISO 100 24mm using a 24-70 L lens.  Beauty dish with a 15 degree grid.

Here we are mixing natural light with a flash.  I wanted the have the windows appear in the image as a distraction in the negative space.  To light her up, and only her, I have a 22" beauty dish to my left with a 15 degree grid on it.  This gave me a very focused light that is just on her.  Of course, this allowed for the reflection to be even brighter because the piano wasn't lit up at all.  It takes some study to figure out the piano is even what it is.  The natural light coming along the side showing the curves of the piano make it evident.

The lighting position is easy to figure out by the small spot of light off her left shoulder.  That gives you an idea of how narrow the 15 degree grid can be.  I rarely use it, but this shot wouldn't have been possible without that simple modifier.

So, for those who don't think one should ever mix natural and generated light, fooey!  Light is light and it does work.  (fooey is a term I use to describe expert opinions based on lack of ability)

So, there is some of my thinking while shooting those particular images.  I'm sure Marcela was wondering if I had a clue as I was tripping over cords, opening and closing blinds, And occasionally just standing there looking around and taking in how the light was hitting everything.  An interesting side note.  Marcela is nude in this shot.  Sometimes that adds a bit of emotion to a face when they are in an odd situation.  Like pretending to play a piano in the nude.

I hope you found a morsel of inspiration here to try something you aren't used to, or a tip to help.  Comment if you did.  Or, if you have a fooey to share.

Myth busted!!

Lately I've started shooting covers for romance novels.  This isn't a stretch from my typical art but there are several differences that are challenging.  Challenging in some artistic ways to push the sides of my box out a little more.  And Challenging in some 'I don't have time for this shit' ways too.  And, for those that know me, I am quick to yell 'NEXT' and move on when the defecation hits the rotating air moving device.  

It's clear to me that people who have never been to a photoshoot, especially one with a couple that appear in various stages of undress, have no idea what it's like on set.  Imaginations go wild with thoughts of naked people chasing each other around, drinks flowing, and all sorts of pagan rituals going on.  This is the biggest myth I can think of about photoshoots.

I expect some might be like that....  I can't confirm that.  My shoots sure as hell aren't and I CAN confirm that.

In every shoot I have a trigger I'll pull and stop the shoot, sending everyone home if any inappropriate behavior happens.  Period.  I might pull someone aside and discuss the problem and see if we can come to an understanding but that's a one chance deal.  Second offense and shoot is over.

Each pose is choreographed and head, hands, and the mood of the shot are set.  When that shot is over, the models move to the next requested pose.  They have the freedom to give me expressions and do what their job is, TO ACT like a loving couple.  

I've shot couples before that were worried about their real life significant other and what they might think about this pose, or if their hand was here, or even if they LOOKED like they might be ready to kiss the other person.  This is why I'm extremely cautious about what couples I work with.  I don't want to cause problems in anyone's relationship.  And if that's looking like it is the case I move along to the next person until I find one who knows his or her job and is willing to do what it takes to get the material we need.  If they are in a relationship or not, and they are ready to do their job without fear of a jealous partner, the material will be stellar.  Otherwise, it's not.  Why would I go into a shoot without the expectations of awesomeness?

Now, as strict as that all sounds, there is always some laughing, joking, and eye rolling in every shoot.  Frankly, I haven't noticed more or less during a romance cover shoot than in any other type of shoot.  Lightness and fun are important.  Safety and respect are paramount.

I've said in previous blogs that the photographer is the captain of the shoot.  The one in charge.  Being in charge means a long list of responsibilities.  Getting the shots that will rock.  Being the one person who sees what the camera sees is probably the main reason the photographer is in charge.  In the end, we are the ones to provide the finished product.  But, when shooting couples presents a special bit of responsibility.  The safety of the models.  In the case of romantic poses and semi nudity it's extremely important to have a male model that respects that it's a job and not a 'hook up opportunity'.  During and after a shoot.  If I have even the slightest hint that a male model is not 110% professional that guy won't be in one of my shoots.  Period.  Even rumors.  

So, for those bible thumpers, and day dreamers out there...

The creativity is there.  The acting is turned up high.  The lighting is set to amazing.  And awesome images are the result.  No orgies.  No groping.  I tell them where to put their hands.  My images may edge into R but never X and never will.   Sorry if I burst any bubbles.

Be a pro or go home. 

Eye Captain!

As the photographer in a shoot, I am ultimately responsible for everything that happens.  I might go a little over the top by paying for parking tickets, and being the one who talks to the authorities, and over all being the captain of this temporary ship, but this is important to me.  Everyone in the shoot is counting on me to give them wonderful images in the end.  That's a lot of pressure, or it used to be before I understood I had to be the one in charge.  At the end of the day, those images are going to be uploaded and it's up to ME to start cranking out a few, hopefully, amazing shots.

This is not to say everyone doesn't do their part.  Actually, the captains job is the easiest, or appears that way.  The model needs to bring their skills to the shoot as well as the makeup and hair and fashion providers.  If I have a stylist it's a little easier as my attention can be more focused on the final shots.

Now, I said the captain has the easiest job.  Actually, not true.  I did say 'appears'.  Here is a rough list of what stages I go through in my thinking leading up to, including, and after a shoot.

  • Before a shoot I'm considering the lighting available at a location at that time, or what lighting I'll have available in the studio.  I go over my inspirational images (about 3,000 at any given time - artists call these 'references')  I have to consider the comfort level of the model, full nude, implied, or are we doing head shots?  There is a certain amount of creative energy being wound up like a spring before a shoot.  Interesting note here.  If a shoot gets canceled last minute, I usually hit the computer and start retouching from past shoots to take advantage of that tightly wound creative spring.
  • During the shoot it's important to guide the others to the shot ideas you have in your head.  The inspirational images I've chosen help give them an idea of what I have in mind.  Very important.  But taking my time and taking a LOT of deep breaths to give myself time to think is THE most important thing I can pass along here.  I have a place to set my camera down in the studio and on location I have a strap that lets it hang by my side.  I will take 10-20 shots and typically put the camera away for a moment.  This gives me time to think.  Sometimes I'll just stand there and stare at what I have in front of me.  I'll be thinking of how I can change the light to better show some feature on the model, or give it a more artistic slant.  Take this time.  It's VERY important to the end results. 
  • Post shoot is the results of all previous efforts.  And it's just me and the images I've captured.  And if they suck...well, it was probably my fault.  At that point, if nothing really worked, it's my fault and it has wasted everyone's time and effort.  Sometimes the chemistry just didn't work.  Very rare, but it happens.

Early on I ran into this a few times and it taught me everything I mentioned above.  The responsibility of the results is mine, so I need to be the director and take charge to make it all work.  That's my job.

An example of seeing the end results in your head and taking the shot to help you create it.  Take the time to think and be creative.

An example of seeing the end results in your head and taking the shot to help you create it.  Take the time to think and be creative.

Back to the 'thinking' between sets.  Closing your eyes to envision an image, or looking over the selected inspiration shots to juice up your creativity, whatever you find it takes, take the time and get creative.

After a few years of doing this you'll start to see things that aren't there.  Okay, that sounds crazy.  Here's an example.  I took this shot of Lance in the forest.  I even broke some rules and lit him up very contrary to the sun coming through the trees.  It looks odd, but odd works in art.

Lance Jones at Bonita Creek, AZ

Lance Jones at Bonita Creek, AZ

This isn't what I saw when I took the shot.  I knew I could change the light after the fact and I continued to play and place him different ways.  I think I only took maybe 20 shots.  And when I locked in on the one I thought was the best, I started forming it into that shot I saw when I took it.  Here you go!

The light is still a little strange but that adds to the mystery and story the image is telling.

So, start looking at what you have around you and what you can create from it by lighting it up to make your vision come to life.  At first the models will scratch their heads because the images they see aren't very inspiring.  After a while they will learn your style and trust you no matter what you ask them to do.  Because they know you know what you are doing.  And once you get to that stage it's easier to take charge and run with your ideas.  Everyone will run with you.

Think.  Shoot.  Think more.  Breath.  Create.  Take the time it takes to be great at it.


Going nude?

I hear a lot of stories about good and bad experiences in this 'industry' of photographers and models.  I quoted 'industry' because most of us do this for the fun, creativity, and it's more of a hobby than a job.  Some of us have just allowed our passion to make it seem like a full time job.  That's not the subject I'm covering, but it sets the stage pretty well.

The bad experience I hear about most are models being asked to pose nude when it was made clear that they didn't do nudes.  There is always communications to set up a shoot.  Via Facebook or messages over some other site, but still communications.

Typically a time and place are arranged as well as any compensation or trade agreements.  One more thing is often discussed.  Will there be nudity by the model.  (nudity by the photographer is whole different kind of bad experience we aren't covering here)  As a model, the topic should always be brought up unless the shoot is specifically for fashion.  It can be a very casual comment of what restrictions you might have as a model.  But, in the first part of the communications, if it seems likely that some of the work may involve nudity, or if there isn't any set ideas, it should be covered so everyone is clear.

This is Tayler and she doesn't do nudes.  This is called implied nude.

There are two basic types of nudes.  Implied nude and nude.  The differences are very simple...at least in my world.  The above image is implied.  I guess another word for it could have been 'obvious' because we aren't really implying anything here.  So, what's the difference?  Well, the lack of seeing anything you wouldn't normally see if she was wearing a bikini.  I could draw a couple tiny lines on that image and she'd look like she was in a swim suit.  So, she is nude, but her nipples and vagina area are covered.

I'd like to point out that some people see just about anything as full nudity.  A picture of a woman's back without a bra strap is nudity and, in some minds, totally offensive.  That's their choice, their upbringing, their religious beliefs, and in all cases not a problem we can solve.  Or one I care much about.

So, the clear definition, in my world, is implied nudes can show as much as a bikini might, without the bikini.  Nude is showing the whole body often including nipples and sometimes the vagina.  Both done in a very classy, classic, and artistic manner.  

If nudes are fine with the model a little discussion about some of the more erotic poses should be discussed also.  The word most often used is 'spreads' and I think we all know what that means.  Most nude models I know will say 'everything but spreads'.  Kinda' gross, but it sets the boundries.

This is Keira Grant from Texas and she is a classic artistic nude model. (best I've ever seen)

The above image is a classic artistic nude model and pose.  All body parts are open to be photographed.  Note that she has hair, or as she jokingly calls it, 'shrubbery', covering her lower bits.  I'm my opinion any model doing fine art nude modeling should be natural (un-shaveded) there because it affords the model some additional poses that would normally be considered erotic and less tasteful.  This model can actually do the aforementioned 'spread' and the image is tasteful and artistic.  Again, off the subject, but important at the same time.

(oh, and you young gals out there that think not shaving is so 70's, any Playboy from the year 2000 will not show a single shaved model - so there!  I guess it's more like - so a decade ago!)

Now to the point.  Photographers pay attention.  If the communication is made ahead of time and the model has told you she doesn't do nudes or doesn't do implied, that's that.  Done.  End of discussion on that topic.  The line has been drawn.  If your shoot continues on schedule that's great but not once, ever, during that shoot should the model be asked to do more than she has previously agreed to.

This is where NO means NO!  Any photographer who asks again, and in some cases begs, pleads, makes the shoot difficult, or starts pouting to try to get the model to change her mind is not a professional.  You are here by designated as the dreaded GUY WITH CAMERA and it can be assumed you are doing this because you want to see nudity, not to capture amazing work with your camera.  Shame on you.

If the model has shot nudes with other photographers but has made it clear she isn't doing nude for your shoot, it still means exactly the same thing. No.  She should not be expected to go beyond her comfort level with you...ever.  If you, as a photographer, get upset about that, or take it personal, get over it.  What you will never know is what the relationship and history that model might have with the photographer that did the nudes with her.  You don't automatically have that relationship by some magical proxy. 

Working with a model, finding that there is a creative chemistry there, may, over time, build that same comfort level and trust that she has with the other photographer and she may open up to doing nudes with you.  In the mean time, create, provide the best you can to the model, and do this with an honest intent in your heart to give her great images for that sake and not just in the hopes of shooting her nude someday.

I work with several models who are comfortable doing just about any form of art with me but still have strict limits with other photographers.  There may be many reasons for that.  One could be that I'm over 60 and they know I'm not looking for anything from them than the art we can create.  They know I'm happily married.  In all cases they know I have no interest in anything other than creating fine images.  In many cases we've shot often enough that they have become good friends.  It's all about trust.  My hope is that they just love the fine art I create and they are willing to work with me to create it, even if it's implied or nude.  I should point out that the opposite is true.  I have worked with several models who have done nude work with other photographers and have declined to do nude work with me.  That's a no, and I respect that and never ask again.

If you are a model and it has been previously agreed what your comfort level is, and you are being pressured to go beyond the agreed point, consider packing it up and heading out.  Things often go down hill from there, especially if it's a constant pressure.  It's always your call of course, but if you now don't trust your photographer what good can you expect from that point?

So, there you have it.  If you are a photographer who begs, stalks, constantly texts models to shoot with you, you are a GWC.  If you ask a model more than once during a shoot to do implied or nude when it was agreed before hand what the limit is, then you are a GWC.

If this blog has made anyone rethink how they communicate and interact with models then it did as intended.  Unfortunately, many who practice the GWC type behavior won't think this is about them.  It is.

Easier than it looks...Photoshop

There are times I'm asked to teach Lightroom or Photoshop but I have to say no.  Not because I don't want to.  I dearly LOVE to teach, especially things I love like the artistic end of photography.  When a prospective student asks me if they can video the training session and/or they want to take detailed notes...such as step by step keystrokes and mouse clicks during the session.  Nope, sorry.

Some learn best that way.  I get it.  But there are some things you really can't get that detailed with.  And, as intimidating as Photoshop might look to a new user, it's not a step by step process to work magic with it.  Some think there is a certain process that is done to each image to bring it to life.  For some very special artists out there that have a very specific style there very well could be a very expect process to get that look.  Even then I'd venture a guess that every picture is different just a little in some aspects of what is done to them in Photoshop.

So how do you learn to be fairly good at Photoshop.  I'd say you get comfortable after playing with it for about 100 hours.  That's REAL comfortable.  This is the point where you have learned enough about all the features and the variables that they have, to start thinking about what you want, and then just knowing how to get that look.

Of course, you don't learn it all at once.  As you get to know and have used each feature enough you add more to your palette of things you can do.  In the end, and after plenty of practice, you will be able to bring up an image and start editing with confidence.

Here's a simple example.

Aurora on the beach - original

The above shot is the original shot taken on the beach at Huntington Beach.  Although Aurora is stunning as always with a great pose, the sky looks lack luster, the sand is dirty, and focus isn't on her as it should be.  This is where Photoshop skills, a couple plugins, and a vision of what we'd like come into play.

So, let's make it artistic.  Overboard a little for some but it's art...we can do whatever we want with art.  I love the surreal look myself and I think I got that here.

Aurora finished


Now, here are a few things I might have done to make this image look like I wanted.  And I tell you this to give you more of a feeling for editing from the minds eye and not push this button, then this button, and then this button.

I use the NIK filters from Google and the Photographers Photoshop package from Abobe's Creative Cloud.

  • I pulled her hair out using Liquify to show some wind and enhances her already wonderful emotion.
  • I dodged and burned to highlight her shape giving her an almost 3D look.  I also streaked her hair brighter to show more body.
  • The sky is very blah.  So, I brought in a stock image to add a dramatic sky to the background and blended it in with a mask.  Then I used several features in NIK.
    • I used the center lighten to put most of the light on Aurora and darkened around her.
    • Adding some tonal contrast to bring out the lights and darks just a bit more, especially the sand.
    • Then some detail extraction was done...seasoned to taste as all of these are.
    • And last was an image sharpener to put just an illusion of better focus.

So, I could give you a keystroke and mouse click in total detail, but 90% of the adjustments were done to meet my vision of what I wanted, and it would be useless to mindlessly follow the same thing on every image.  Each one is done with adjustments custom to the exact look we want.  Here is another image from the next day and obviously a whole different approach was taken to edit this one to give it a very different look.

Tayler finished

So, get crack'n.  Learn Photoshop by just using it and using it.  Watch a lot of videos and get the basics down and after a while you'll get the hang of how to use it by feeling more than just step by step.  Then you can become the artist you need to be.

Have fun!!

Lightroom workflow

When I first got started with Lightroom, I think it was version 4, I knew I needed to understand the whole Catalog system.  I didn't want to end up years down the road wishing I'd done something a different way and then spend days changing it all later.

So, here I am, almost 6 years into it, and I do things exactly as I learned how to do it day one, and I'm still very happy with my control and ability to find EVERY shoot I've ever done and bring it up with all included files.  Right now I have 26 terebytes of photos from over 1,000 shoots so it's pretty important to be able to navigate that mass.

Here is a video I did to explain the process.  Mine isn't the right way for everyone, but it's a great place to start.

Enjoy learning and I hope this helps.

Watch your head!!

After over five years of passionately following photography I have the opportunity to look back and see the various stages I went though.  I don't expect I'm so different from anyone else and went through more or less than others did.  And, I tend to sit back in my chair often and ponder the why and how of things.  Especially things that bother me.

For example, there was a time I got jealous when a couple models I'd worked with often, worked with some others and got amazing images.  I was more upset about being jealous.  I even wrote a whole blog about it and resulting epiphany.

For those of you just starting up, you're going to suffer the trials and tribulations of models flaking on you, or having to beg or pay people to work with you.  There was a time that any shoot was fairly iffy.  And typically the talent wasn't top notch because, like me, they were just getting started.  The posing usually sucked, my directing being most of that problem, and it was just all around practice runs.

The reason for the rough road in the beginning was the lack of style.  Style, in this case, included everything.  Directing, lighting, post production.  They all sucked.  They were supposed to suck.  I was new.  I was finding my way as we all do.  It's called paying our dues.

This was the time when just about everyone else was taking pictures that I liked.  So there is something else we learn in the beginning.  This is were we start looking at what images we like and subconsciously deciding what we like and don't like about an image and why.  I think this is also a BIG contributor to our styles.  We are narrowing down who's work is stelar (to us) and we strive to make our own work eye catching and thoughtful.  And that comes from using the combination of bits of other's styles we liked.

Those first couple years are full of turmoil and self doubt.  Can we make it?  Why are we doing this?  Is my passion strong enough to take me through this phase.  Some don't recognize the process at all and jump in thinking they are going to make it to the top (if there is a top) within weeks of months.  Some take longer than others to get through the levels, but I've observed the ones that stagnate and don't grow seem to be those that don't understand the growing, reaching, and learning involved to get to the next levels.  They don't know about paying the 'dues'.  These photographers don't understand why they don't develop a style, or consider just adding a filter to a picture a style.  

Looking back over the 5 years I can say I've grown considerably.  I'm proud of everything I've learned, all the things I tried and failed, and even the things I found by tripping over them.  I've always known there was something else...something just out of reach but still reachable.  I'm good with that.  I live for that.  It's never 'the end' of learning and trying new things.

I love to work with new photographers and show them what I've learned.  Sharing is what life is about after all.  I also love working with the ones who have had the passion and have years into it.  I can learn from them as they can from me.  When two passions enter the same room it can be great fun and a lasting event from all they learn from each other.

This is where enlarged egos have no place.  Not if you are going to grow.  There are plenty of top photographers that are open to anything and everything and share and don't see others as 'competition' but as peers.  Those that post videos or answer questions about how they do everything are my heroes.  They get it. The true creatives are excited about it and want to share.  The ones that are not nearly as confident appear use their ego to hide their lack of confidence.  The chest beating and self important people in any industry usually lack the confidence and experiance to actually be what they want to appear to be.  And sadly, many are actually talented but will stagnate because growing is a bit to frightening to them.  If your doing pretty well with floaties why learn to swim, right?  Of course, this is just my observations.  I'm not a physiologist.  Heck, I could probably use one. 

If you are brand new, understand the phases you need to pass through to build the style and confidence you'll eventually have.  There are no short cuts.  Read, learn, watch videos, and heck, read a lot of blogs!  Wear out your first camera!  For those that are 'there', have the confidence, the style, and do amazing art with their photography, very cool!  You can relate to all I've said I expect.  And, more important, you know that you aren't 'there'.  It's a journey.  A smoother journey from here because the talent you work with is far more talented and creative.  That, of course, adds a LOT to the success of our work.

I used to get depressed and get the photographer's version of writer's block.  Then I learned it was just what happens before a new level of style and technique break through.  Today I get excited about those blocks as I wonder what the next level will be like.

Enjoy the journey!!

Style is the difference

If you want to see my eyes roll, just tell me you never edit your images, you get them perfect in the camera.  Yeah, right.  What this actually says to me is that the photographer simply doesn't want to learn how to make their images better by editing them.

Here's what I see when someone says they just get it right in camera.

Anyone with a saw can get a log to look exactly like this every time.  Clean and neat and it looks like every single log in the wood pile.  Value?  About 50 cents.  Unless you are really cold, then it's more, but I digress.

Now, here is the same log, but edited by a craftsman, with tools they have learned and used for many years to perfect their skills....and, alas, their style.  And the value?  A hell of a lot more than 50 cents.

So, here's the deal.  You have to have a style of your own.  Period.  No question.  If you want to make money or just stand out from the crowd, you have to be unique.  Style does just happen.  And it'll be a unique style.  But the hundreds of hours of trial, error, learning, and growing are required.  And hell yes, that road is paved with self doubt.  You can bet your life that the above beautifully carved furniture wasn't the craftsman's first try at it.  He or she is very skilled at taking that block of wood and shaping it into something beautiful, something that makes you enjoy the curves, and invites you to touch it and feel the smoothness.

As a photographer you have to know your camera...all of it.  What everything does, how the lenses work, what settings give you what kind of raw shot.  You need to know about lighting.  Not just studio but how to use natural light to the best advantage.  You have to learn to see light differently than you ever have before.  And then you need to know how to edit.  Learning how to blend and adjust an image to look like your heart says it should look.  Some say this is cheating.  These folks are easy to spot....they are the ones sitting on logs.

A style can take years to develop and it will sneak up on you.  One day people will look at one of your images and know it's yours just by looking at it and seeing something subtle about it that is, indeed, your style.

The style is a refined understanding of all of the tools and then your mind finishing it off with the feel, the flavor, that moves you.  An image can take minutes to complete or hours or even days.  Every style has a bit of artistry in it in the end.

Style draws customers.  Especially customers who understand quality and will pay for that quality.   It's not easy.  It's very hard work.  It requires dedication.  The results are a life long asset.

Build your style.

This game we play

There are times, very rare and brief, that I ask myself, what am I doing this for?  My quick and first answer is always 'for my art'.  That seems like an easy out.  I know that a lot of the reason is that the self esteem and pride that everyone involved in a shoots get when the finished product is presented is really the true value of all the effort.

The question is still looking for an answer that is more tangible.  For me, it's going to be publishing and promoting classes I expect.  For you, well, you should be asking the question and I'd hope the answer is at least the top two I mentioned.  Of course, if you are doing this to put bread on the table...well, can't think of a more rock solid and easy answer.  Of course, if your answer is that you just like to be around the young ladies....enjoy, but stop reading my blogs.  I doubt someone with that reason reads photography blogs anyhow.

Tayler Vomacka...an amazing model and regular in front of my camera

So, after 5 years of shooting, learning, traveling all over, and even wearing out some camera gear, it's time to be more serious about what I do and why.  Not TO serious mind you.  The fun of creation can be stifled pretty easily by something as serious and seriousness.

I think, besides publishing, it's time to frame and show some of my work somewhere.  Maybe at an art festival?  Don't know.  I'm taking suggestions.

Meanwhile, along with that question of 'why' is that continuing pull to improve and excel over my own previous work.  I'm starting to find myself editing a few images and at the end of the effort I sit back and grumble that it's not good enough.  That's starting to reflect in my shooting style by spending more and more time thinking about a shot, framing the shot the best way, and taking fewer shots.  It's painful in a way, but wonderfully enlightening in another.

Painful because I'm my own worst critic, enlightening in that I'm turning down some of my own work that a few months ago would have excited me and been worthy of my watermark.

So, taking some time to think about more tangible options for my art as well as pushing the learning curve and refining my style more.  At least that last part is an on going effort...an effort I tend to love.

Inna B-g - wonderful traveling fine art model

Inna B-g - wonderful traveling fine art model

Push your limits and always stand back once in a  while to see where you are at and nudge the wheel to take you where you want to end up.  Or at least to the next 'stand back' place.

My solution to equipment at locations

I love shooting on location.  And up until now, I had my camera on an R Strap around my neck, a beauty dish on a stand with a Vagabond battery/inverter and that combination would be hoisted on my shoulders when we moved locations.  And I move around a LOT.  Usually 10-20 shots and I move to the next spot.

Of course, I might get hassled by the cops for looking homeless now, but that takes the pressure off of being a photographer without some 'permit'.

I've tried several other options and they just proved to cumbersome to use.  Wheels to small, or not enough room to carry everything I needed.  

Enter, the wending cart from Harbor Freight.  About $60 and easy to put together.  In the photos I haven't attached the center pole for the flash with pipe clamps yet but that's how it will mount.  That pole with a lot of height is simply the center of a standard light stand.  When lowered all the way it's as high as the handle.

The way it sits on the ground flat when sitting as seen in the pictures is perfect.  It's not going to roll anywhere and it's pretty solid.  The wheels are big enough to easily go over curbs.  Wider wheels would be cool to go over sand, loose gravel or dirt better, but still big around enough to make pulling a heavy cart easier than smaller wheels.

The handle doesn't fold down, it's designed to be a solid device.

About 20" deep, 30" wide, and 50" tall.  A good size trunk MIGHT handle it, but a truck or SUV would work better....especially since you still have to have room for all the stuff to go on it.

It comes in any color you want.  As long as you want red.

I haven't actually taken it out in the field yet, but I am pretty certain it'll be a shoulder saver without adding other issues.

Let me know if you have any questions.


Dodge and Burn?

I knew about this simple technique from the very start of my shooting career but I wasn't much into Photoshop at the time.  Even after I was, I didn't give it much notice.  Sad really.

The differences between a shot that hasn't been trimmed out with some dodge and burn will almost certainly look flatter and less interesting.  And it's really very easy to do.  Well, like anything else, I've seen people who spend hours just doing the dodging and burning on an image.  So, for SOME it's easy.  I typically spend a whole 2, maybe 3 minutes going over an image to bring it to life.

One of the things that dawned on me one day (don't laugh, it happens) is that my whole life of studying the female body, as most boys do, has been to prepare me for the time I became an artist.  Knowing the details of muscle structure in legs and bones around a neck is very important when figuring out where to paint.

That is another reason I love D&B.  I am an artist.  When I dodge and burn I'm using a brush and doing it the way I like it to look.  I'm doing it as my mind's eye measures my strokes to make the image more mine than reality's.

Here is a link to an action that creates this for you.  But you should still read it over to know how and why it works.

To do this right in Photoshop the best way is to create two layers of grey and set them to 'Overlay' as you see here.  By doing them in overlay the grey is transparent over the image.  This allows you to see where you have dodged or burned better as you work too.  Think of these layers as clear plastic sheets that allow you to add your changes and then change the opacity afterwords if you have over cooked it a bit.  Having the two laters to place your digging and burning separately allows you to change the opacity on each independently.

Now, the technique to start with is actually fairly simple.  Make the lighter areas lighter and darker areas darker.  Usually using a wider brush so it blends well.  Change size based on where you are painting.

As you can see in the examples, arms and legs can be much more shapely with some dark on the edges and lighter down the center. This depends on where the lights were set up of course.  Side to side lighting might have lighter on the sides and darker down the middle.  It's important to taper and shape with the leg or arm and take into account the muscle structure.  You can make a calf really stand out when the original image might not have that noticeably.

One VERY important thing...use a tablet to do this editing.  Having a pen to give you control over how hard the brush strokes are can't be stressed enough.  Imagine a mouse as a paint roller and a tablet as a fine paint brush.  A roller is either on or off.  Great for...well...painting the studio floor.  The brush responds to how hard or soft the pressure is.  If you haven't taken the leap to a tablet, it's a must do!!

Enjoy and I hope this gives you another little tool to refine your personal style.

TAP TO SEE THE DIFFERENCE!!

Tap on the image to flip back and forth between edited and non-edited.  Note the 3D effect.

What are the classes like?

I've been to many classes and workshops.  For the most part, they were all informative, interesting, and fun.  As someone who has taught classes most of my life, I watched the technique, cadence, and content of the classes and how the information was presented.  As a result, my workshops are no only filled with information I've learned in other classes, workshops, and videos, but the technique for presenting that information is the best of everything I've experienced.

My classes are fast paced, yet laid back at the same time.  I give you time to breath and take in what was just covered.  And I make sure all of your questions are answered...even if my answer is 'I have NO idea'.  That's rare, but I'm honest.

The 1on1 classes are 5 hours long.  This gives you plenty of time to ask questions, understand whats being presented, and we can cover a lot of ground.  1on1 classes are customized to what the student needs but most of the time we cover the same things.

The typical day (times may change)

8AM - 9AM

For the first hour we talk about lights.  You'll learn about Studio Strobes, Speedlights, and some versions of hot lights, or constant lights.  And you learn about the various ways to modify those lights to give us the fill, or mood, or contrast you want.  The studio has a very diverse set of lights to demonstrate almost every option.

We'll cover soft boxes, grids, beauty dishes, large and small lights, flash and continuous.  More important, I go over the 'zen' of positioning your lights.  Let me just say you won't walk away with a hand full of lighting schemes...you'll walk away with every possible combination that your mind's eye can come up with.  It's far simpler than you think.

During that first hour we also go over style and how important it is to develop your own style of work.  The first step to a style is the lighting.  The rest is in post production so we continue that topic in the last 2 hours some.

9AM - 12PM

The model will be arriving in studio and you'll get your camera out and ready to do some shooting.  For the next two hours you will be shooting most of the time.  Between sets I'll be explaining the lighting and why it's where it is.  We'll do some 'zen' learning between lighting changes so it's easier to understand how to light to get what we want.  Some would like us all to think it's some exact science and it's very much NOT.  It is, however, a lot of imagination and our mind's eye on what we want to see.

Models I use for Workshops (change occasionally)

There will be anywhere from 6-8 different lighting changes.  And you will have plenty of time to shoot the model in each and every light type.  By the way, the combination is so unlimited that every workshop probably sees different schemes that any previous one.  I make it up as we go along with your input on what you'd like and just how we would position lights to get that look.

There is a difference between two types of classes offered in lighting techniques and model poses.  In the regular workshop the lighting will cover lighting for head shots, fashion, pin up, boudoir, and other typical main stream types of photography.  The Fine Art Nudes workshop will have darker lighting and more 'art' style moody lighting.  The poses are more important in this class also, and just how you would compose fine art.

In both cases I'll be instructing the model to demonstrate how to take charge and get what you need from a set.  I will also step out of that role often and explain the how and why of working with a model.  The manner you speak with them, how to get them into the poses you want, and all of the intricate ways you will be interacting with them.  Both pros and first timers.

12PM-2PM

Now that we have a card full of wonderful images, it's time to gather around the computer and learn some techniques to start to create your style and workflow.

The class is based on Photoshop CC (6) and Lightroom CC (5) as well as a few of the popular filters.  We'll start with Lightroom and how to manage each shoot in such a way that you can move it, archive it, and at all times it's a complete package.  No more 'image not found' that you might see in Lightroom now.  I'll show you a workflow that is easy, manageable, and with a dozen terabytes of images, the ability to go to any shoot and bring up everything you did instantly.

I also show some of the editing features in Lightroom.  Some are easier to do than Photoshop.  Then we head into Photoshop and get down and dirty with some editing.  I'll show you how to readjust the lighting to refocus the viewer's eye, sharpen images, clean the skin, and make hair do far more than the image might show.  Plenty of tricks and tips, but nothing really more fancy than every day tools in Photoshops.  It's just how they are applied to make magic happen.

I don't keep anything a secret because I know that even if you tried to retouch an image I retouched before, they would come out totally different.  Your mine and your eye are the most important editing tool.  Your likes and dislikes will use the same tools I do and come up with totally different looks.  And, since that's YOU coming through, this will be your style!  Oh, it takes a while to get used to the tools but once you use them enough and apply them often enough to really know and 'feel' what they can do, your style will develop.

There are typically a few  'gasps' and 'OMGs' going on as I show the tricks I use.  How my studio looks 30 feet wide when it's really 15 for example.  Or how I get a tight spot light on the model when the image clearly didn't have that look.  How to give someone blue or green eyes in less than a second.  How to quickly dodge and burn to really bring the model off the flat page.

I honestly take 10-20 minutes on each of my edits.  Rarely more and often less depending on the image and what I end up doing with it.  This isn't magic, it's hours of doing this daily and loving it.

After the workshop

High speed idea of some retouching thechniques.

On going communications to help you remember what you learned is provided.  A closed group on Facebook and a passworded area on my website is open to all previous participants.  So, no worries that you are off and on your own after a class.  I'm always around to answer questions and re-explain something we might have covered.

The class is based on Photoshop CC (6) and Lightroom CC (5) as well as a few of the popular filters.  We'll start with Lightroom and how to manage each shoot in such a way that you can move it, archive it, and at all times it's a complete package.  No more 'image not found' that you might see in Lightroom now.  I'll show you a workflow that is easy, manageable, and with a dozen terabytes of images, the ability to go to any shoot and bring up everything you did instantly.

I also show some of the editing features in Lightroom.  Some are easier to do than Photoshop.  Then we head into Photoshop and get down and dirty with some editing.  I'll show you how to readjust the lighting to refocus the viewer's eye, sharpen images, clean the skin, and make hair do far more than the image might show.  Plenty of tricks and tips, but nothing really more fancy than every day tools in Photoshops.  It's just how they are applied to make magic happen.

I don't keep anything a secret because I know that even if you tried to retouch an image I retouched before, they would come out totally different.  Your mine and your eye are the most important editing tool.  Your likes and dislikes will use the same tools I do and come up with totally different looks.  And, since that's YOU coming through, this will be your style!  Oh, it takes a while to get used to the tools but once you use them enough and apply them often enough to really know and 'feel' what they can do, your style will develop.

The best part about my classes is that they are one-on-one.  It's just you and me kid.  Unless you want to use the buddy system and share the class with a friend.  That saves you some cash as well as having someone long who may remember things you don't and vice versa.

Creative energy?

I have a little rule I like to keep to.  As time goes on, and I occasionally break that rule, I regret it more each time I do.  To make it easier for others to understand this rule I'm writing it down.

The rule:  One shoot per day.  Not two.  This goes for me AND the model.  

It is a fact that each person has their own energy stock pile between sleep cycles.  Most have more energy than me.  Another fact.  And I'm not talking about just physical energy.  Actually, more important is the creative energy...this is critical for any artistic shoot.

Anyone who has done a professional full blown photoshoot knows that several hours posing, creating, and shooting, creates a special kind of exhaustion.  You know you haven't done that much physically so it seems strange.  It's the mind that reaches exhaustion in this case and it's because everyone is searching for that creation that the particular collaboration might bring to light.  

IMG_1086-Edit.jpg

Creativity, in its nature, takes as much energy as a full day of physical exersize.

This is the basis for my 'rule' of doing only one shoot a day.  And, insisting that the model or models I work with do the same.  I don't think someone trying to fit two, and even three, shoots in a day, are going to have the creative juices left in the later shoots.  Or they will hold back their energy knowing they have other shoots coming up and that's robbing each project of your full attention and energy.

To make the point of how important I feel about this, I won't do a shoot with someone, even it it's their first one for the day.  Two reasons.  As I already mentioned, some energy is held back by the model for their long day.  And, we are robbing the second photographer of the full potential of the model.  

So, if you plan a shoot with me, I want your full attention and energy.  Don't book another shoot on the same day as ours.  Just don't.