
What are the classes like?
/I've been to many classes and workshops. For the most part, they were all informative, interesting, and fun. As someone who has taught classes most of my life, I watched the technique, cadence, and content of the classes and how the information was presented. As a result, my workshops are no only filled with information I've learned in other classes, workshops, and videos, but the technique for presenting that information is the best of everything I've experienced.
My classes are fast paced, yet laid back at the same time. I give you time to breath and take in what was just covered. And I make sure all of your questions are answered...even if my answer is 'I have NO idea'. That's rare, but I'm honest.
The 1on1 classes are 5 hours long. This gives you plenty of time to ask questions, understand whats being presented, and we can cover a lot of ground. 1on1 classes are customized to what the student needs but most of the time we cover the same things.
The typical day (times may change)
8AM - 9AM
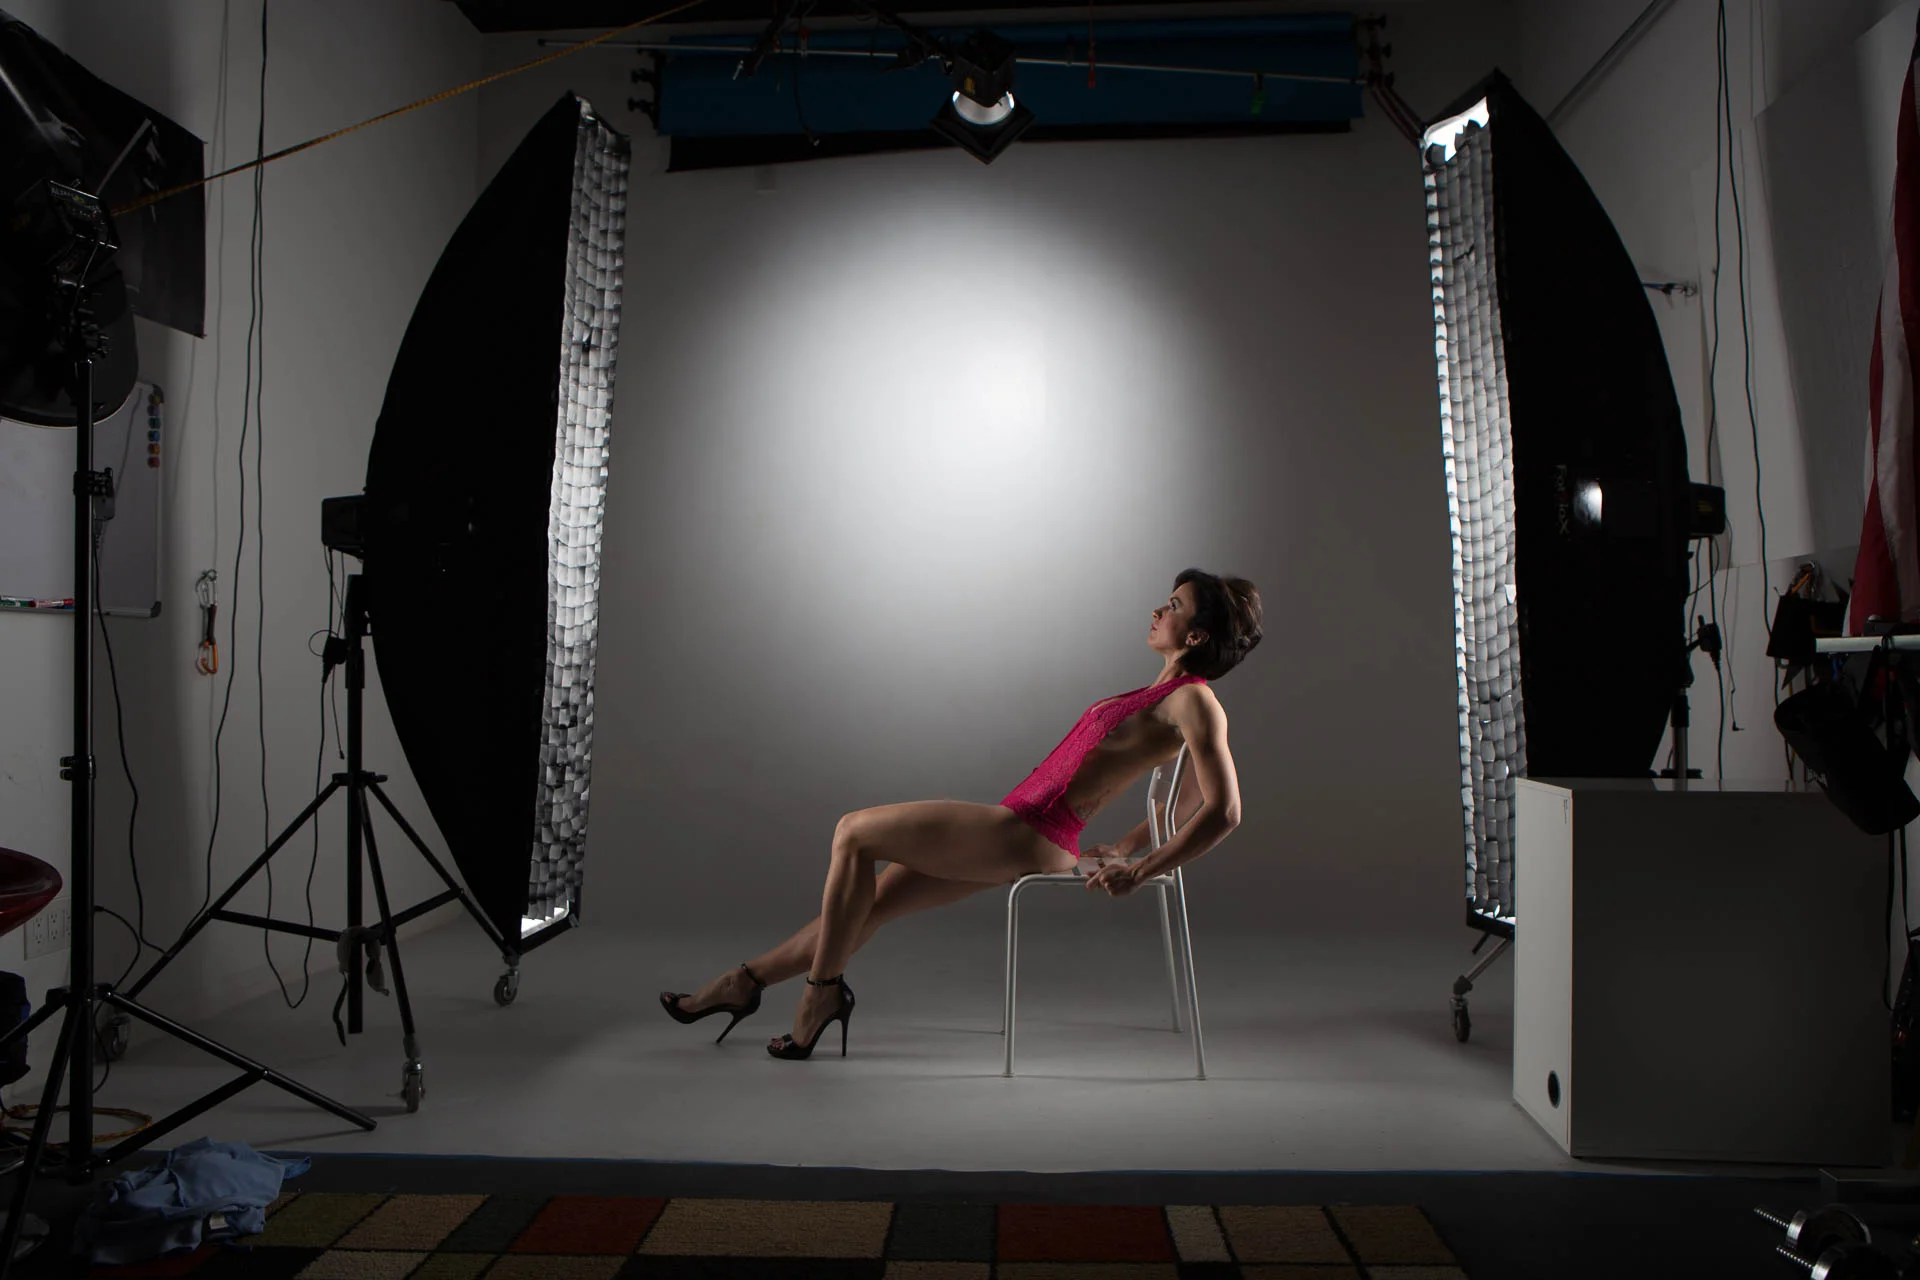
For the first hour we talk about lights. You'll learn about Studio Strobes, Speedlights, and some versions of hot lights, or constant lights. And you learn about the various ways to modify those lights to give us the fill, or mood, or contrast you want. The studio has a very diverse set of lights to demonstrate almost every option.
We'll cover soft boxes, grids, beauty dishes, large and small lights, flash and continuous. More important, I go over the 'zen' of positioning your lights. Let me just say you won't walk away with a hand full of lighting schemes...you'll walk away with every possible combination that your mind's eye can come up with. It's far simpler than you think.
During that first hour we also go over style and how important it is to develop your own style of work. The first step to a style is the lighting. The rest is in post production so we continue that topic in the last 2 hours some.
9AM - 12PM
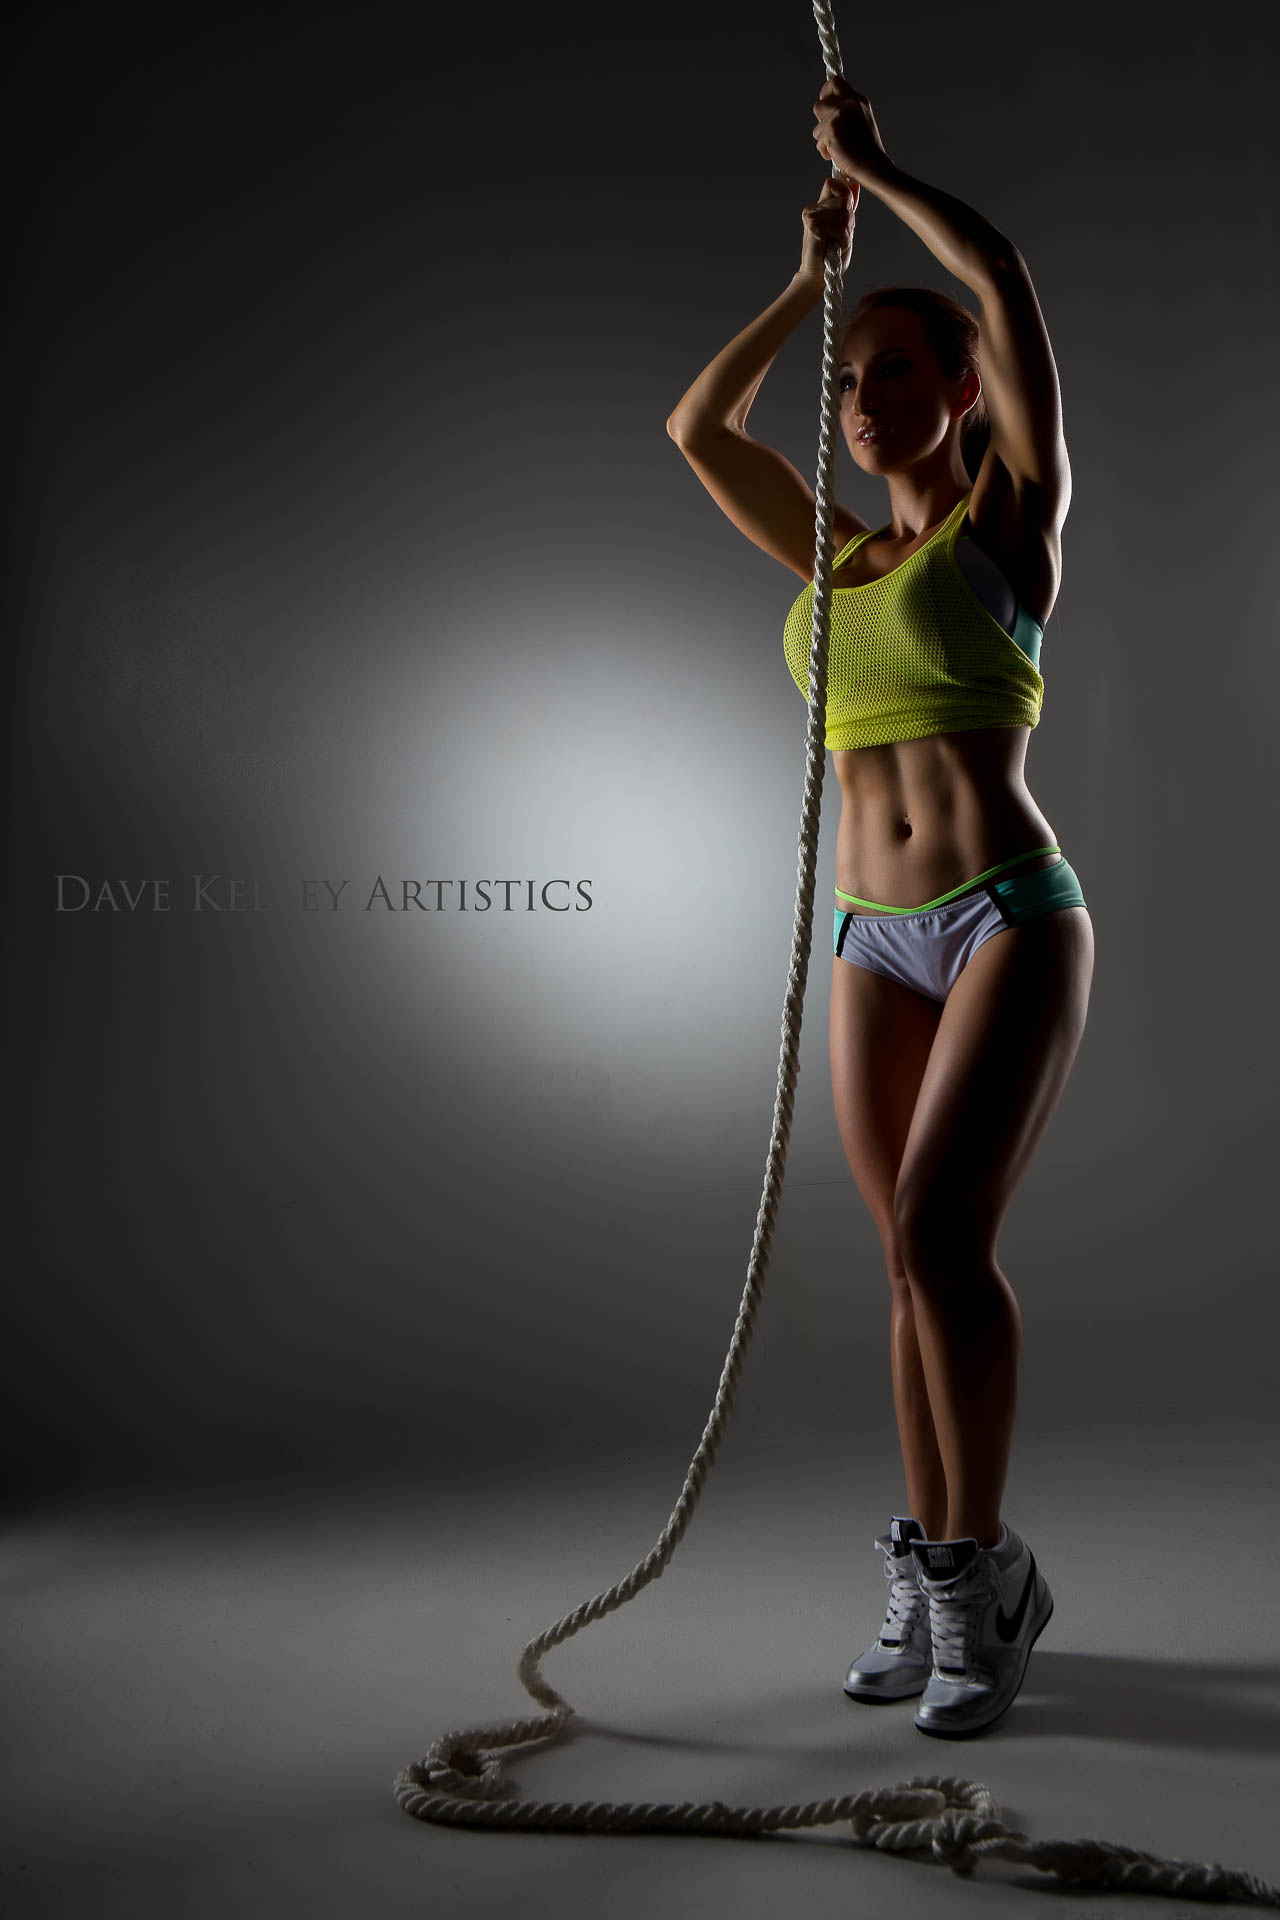
The model will be arriving in studio and you'll get your camera out and ready to do some shooting. For the next two hours you will be shooting most of the time. Between sets I'll be explaining the lighting and why it's where it is. We'll do some 'zen' learning between lighting changes so it's easier to understand how to light to get what we want. Some would like us all to think it's some exact science and it's very much NOT. It is, however, a lot of imagination and our mind's eye on what we want to see.
Models I use for Workshops (change occasionally)
There will be anywhere from 6-8 different lighting changes. And you will have plenty of time to shoot the model in each and every light type. By the way, the combination is so unlimited that every workshop probably sees different schemes that any previous one. I make it up as we go along with your input on what you'd like and just how we would position lights to get that look.
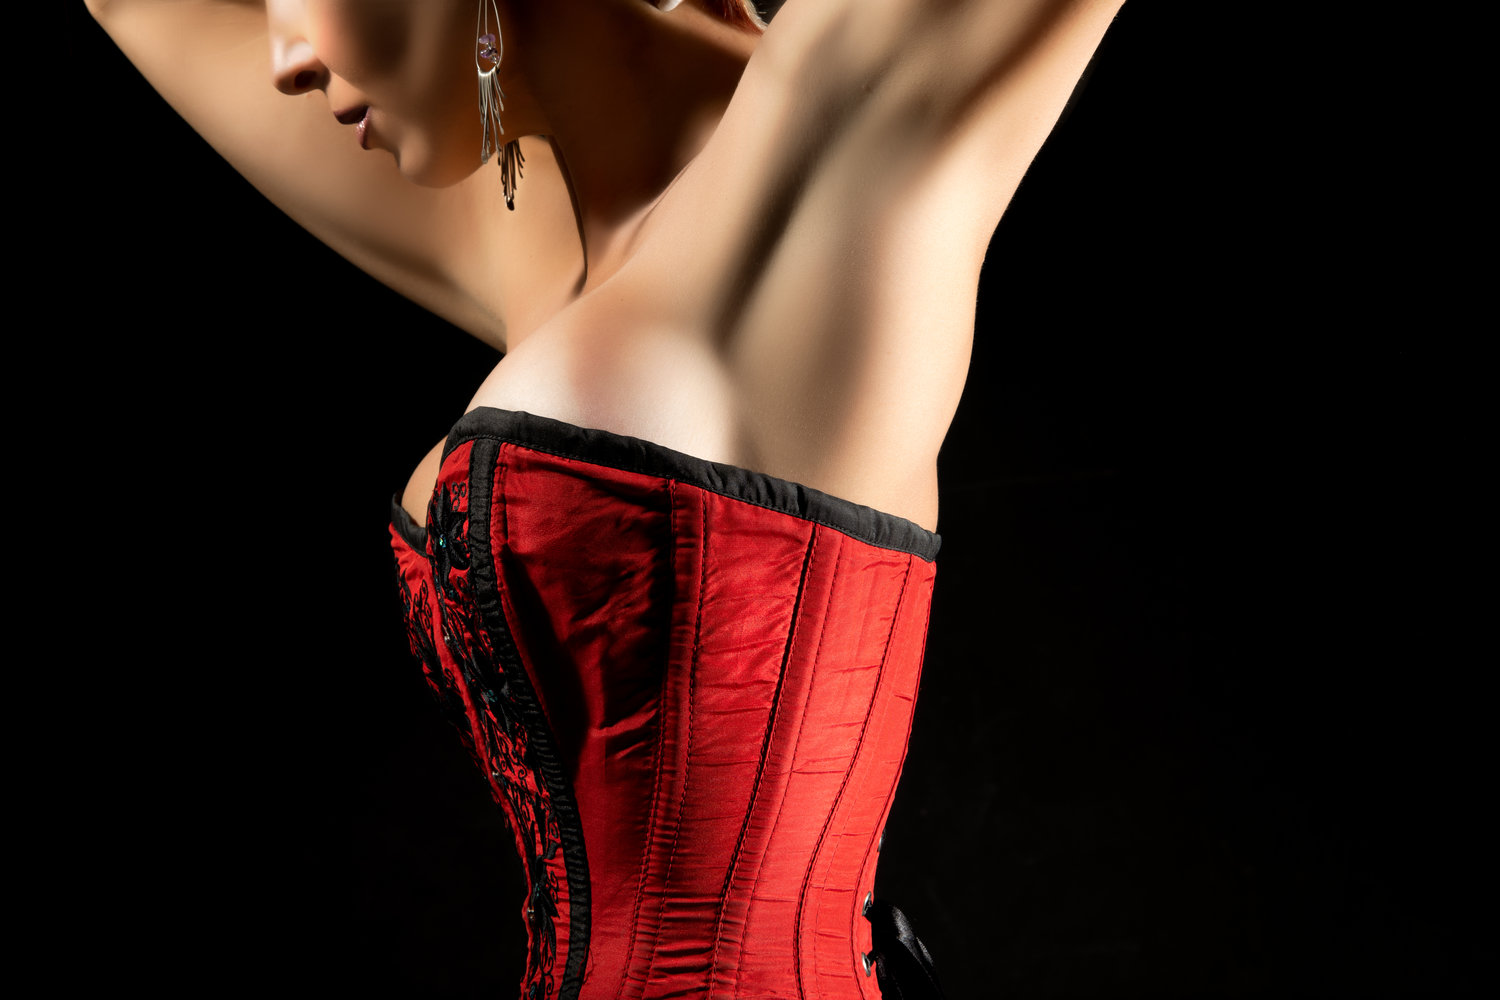
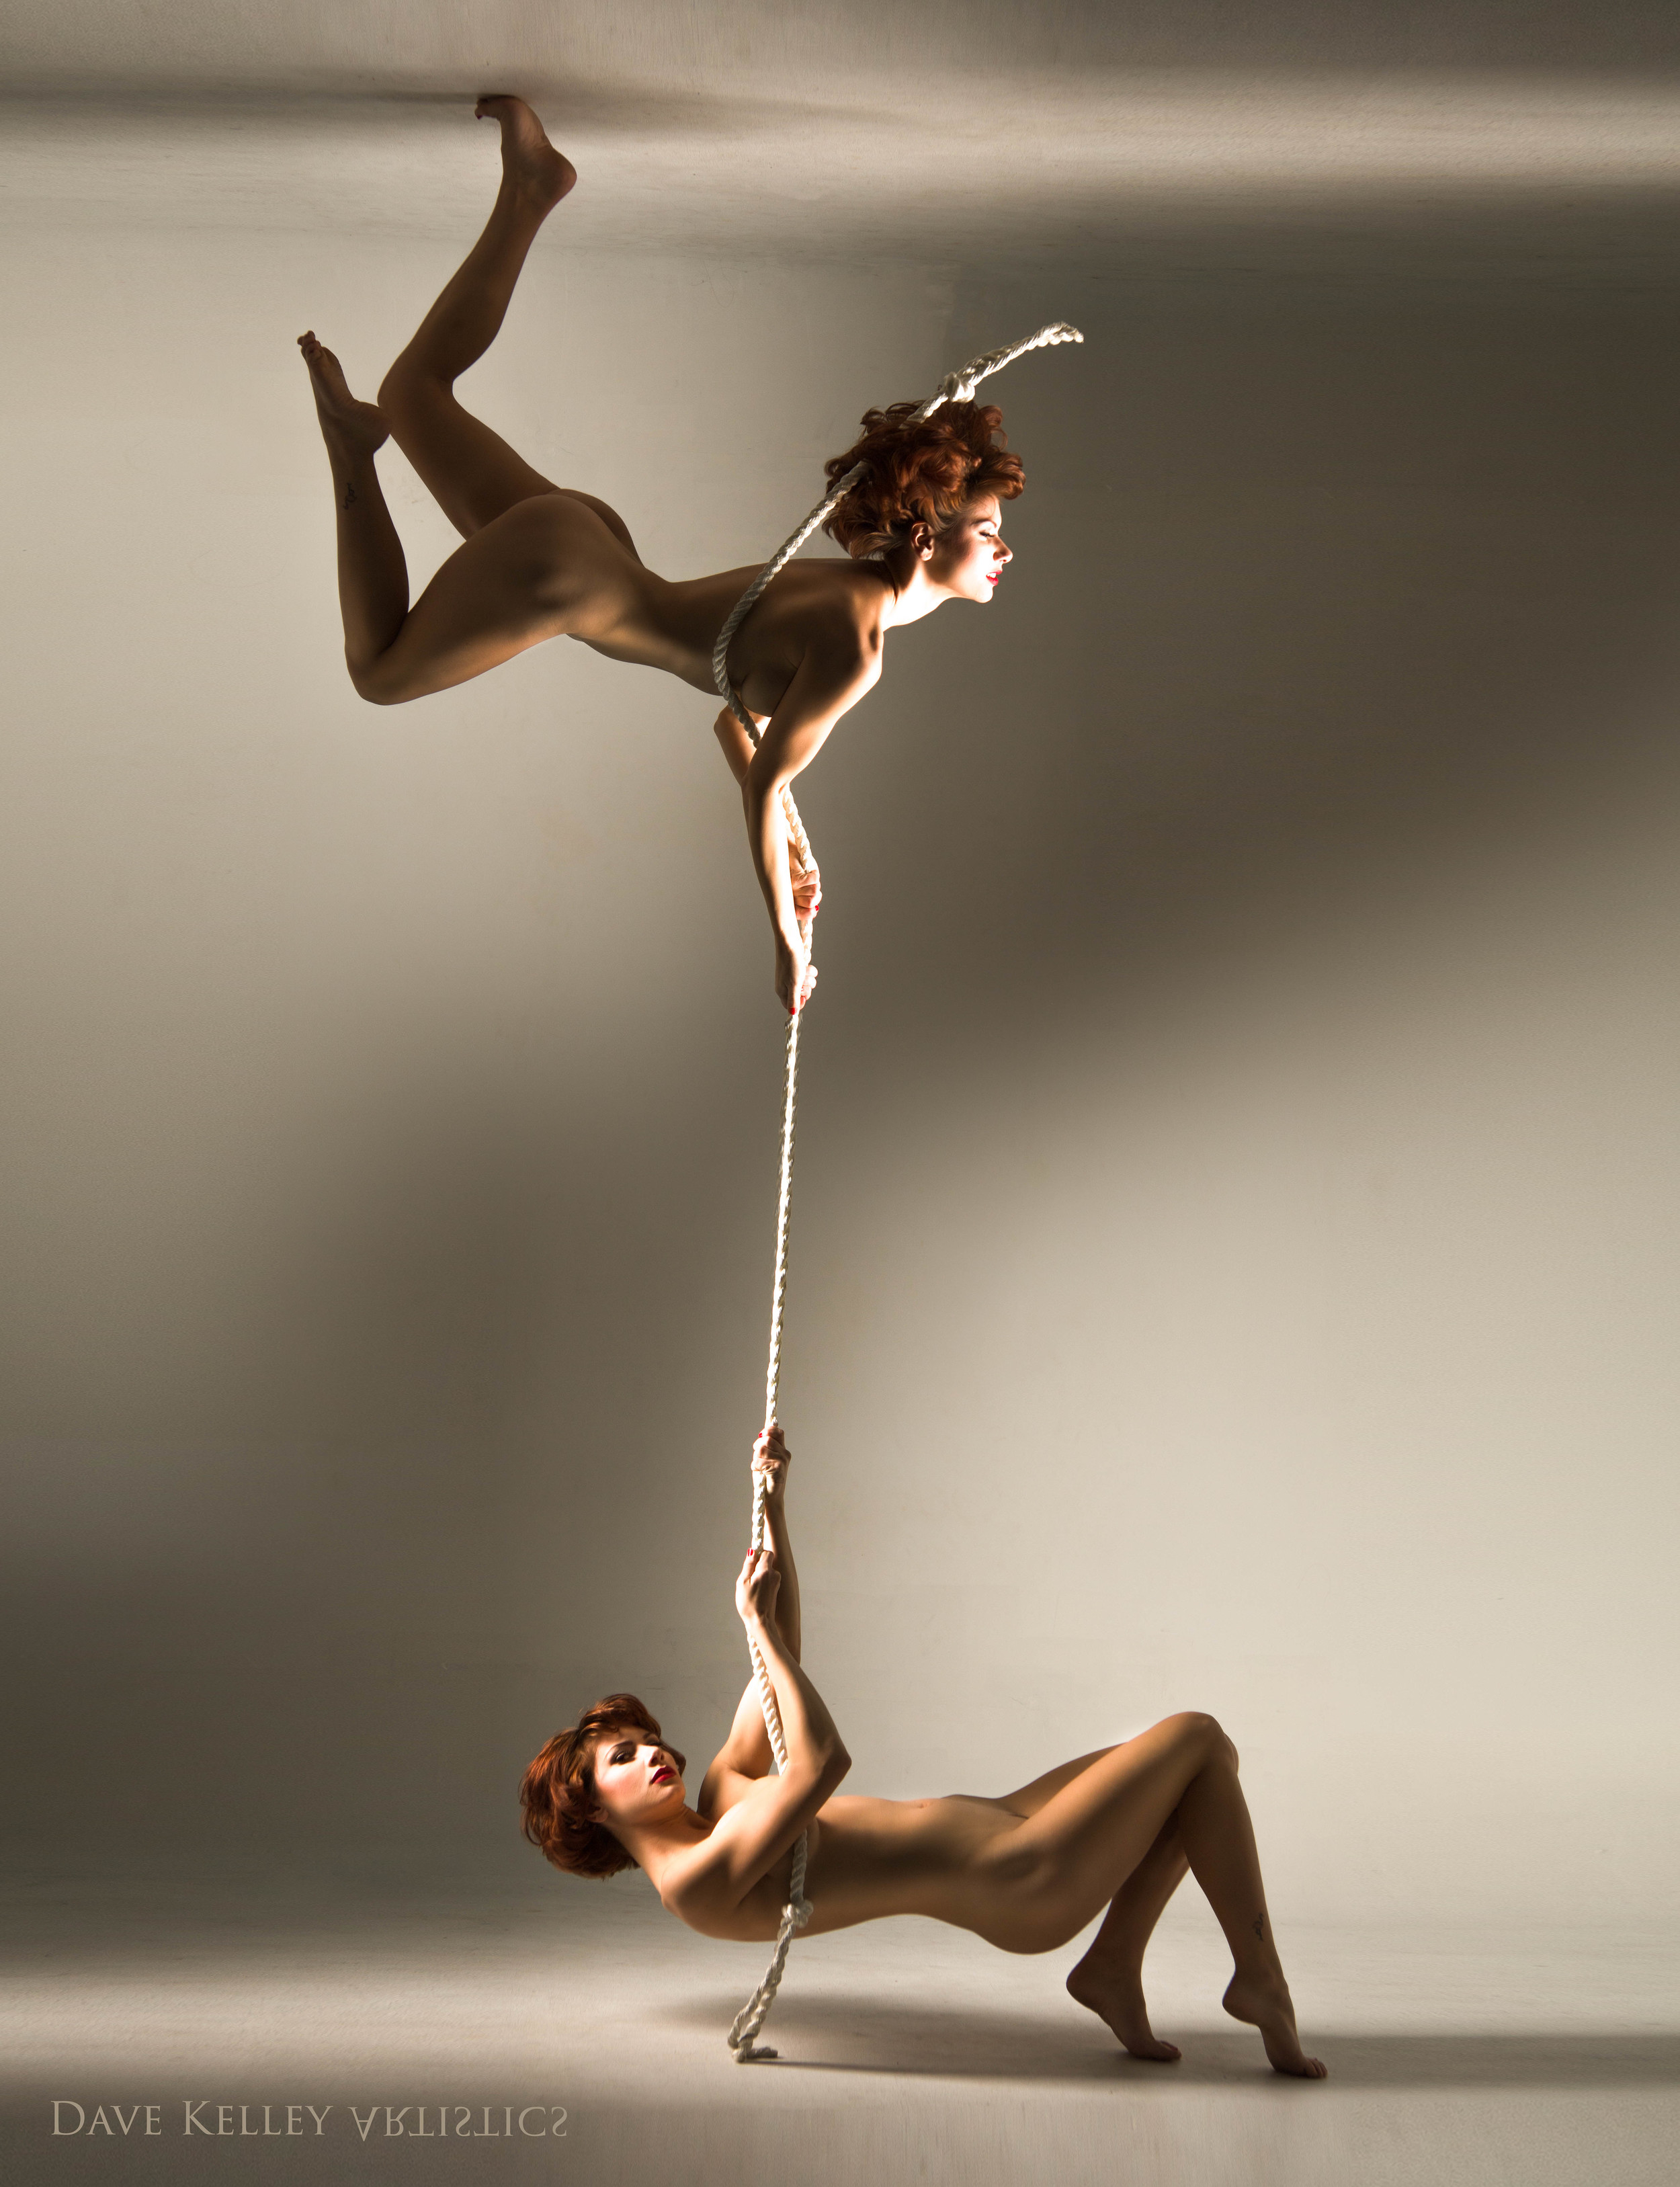
There is a difference between two types of classes offered in lighting techniques and model poses. In the regular workshop the lighting will cover lighting for head shots, fashion, pin up, boudoir, and other typical main stream types of photography. The Fine Art Nudes workshop will have darker lighting and more 'art' style moody lighting. The poses are more important in this class also, and just how you would compose fine art.
In both cases I'll be instructing the model to demonstrate how to take charge and get what you need from a set. I will also step out of that role often and explain the how and why of working with a model. The manner you speak with them, how to get them into the poses you want, and all of the intricate ways you will be interacting with them. Both pros and first timers.
12PM-2PM
Now that we have a card full of wonderful images, it's time to gather around the computer and learn some techniques to start to create your style and workflow.
The class is based on Photoshop CC (6) and Lightroom CC (5) as well as a few of the popular filters. We'll start with Lightroom and how to manage each shoot in such a way that you can move it, archive it, and at all times it's a complete package. No more 'image not found' that you might see in Lightroom now. I'll show you a workflow that is easy, manageable, and with a dozen terabytes of images, the ability to go to any shoot and bring up everything you did instantly.
I also show some of the editing features in Lightroom. Some are easier to do than Photoshop. Then we head into Photoshop and get down and dirty with some editing. I'll show you how to readjust the lighting to refocus the viewer's eye, sharpen images, clean the skin, and make hair do far more than the image might show. Plenty of tricks and tips, but nothing really more fancy than every day tools in Photoshops. It's just how they are applied to make magic happen.
I don't keep anything a secret because I know that even if you tried to retouch an image I retouched before, they would come out totally different. Your mine and your eye are the most important editing tool. Your likes and dislikes will use the same tools I do and come up with totally different looks. And, since that's YOU coming through, this will be your style! Oh, it takes a while to get used to the tools but once you use them enough and apply them often enough to really know and 'feel' what they can do, your style will develop.
There are typically a few 'gasps' and 'OMGs' going on as I show the tricks I use. How my studio looks 30 feet wide when it's really 15 for example. Or how I get a tight spot light on the model when the image clearly didn't have that look. How to give someone blue or green eyes in less than a second. How to quickly dodge and burn to really bring the model off the flat page.
I honestly take 10-20 minutes on each of my edits. Rarely more and often less depending on the image and what I end up doing with it. This isn't magic, it's hours of doing this daily and loving it.
After the workshop
High speed idea of some retouching thechniques.
On going communications to help you remember what you learned is provided. A closed group on Facebook and a passworded area on my website is open to all previous participants. So, no worries that you are off and on your own after a class. I'm always around to answer questions and re-explain something we might have covered.
The class is based on Photoshop CC (6) and Lightroom CC (5) as well as a few of the popular filters. We'll start with Lightroom and how to manage each shoot in such a way that you can move it, archive it, and at all times it's a complete package. No more 'image not found' that you might see in Lightroom now. I'll show you a workflow that is easy, manageable, and with a dozen terabytes of images, the ability to go to any shoot and bring up everything you did instantly.
I also show some of the editing features in Lightroom. Some are easier to do than Photoshop. Then we head into Photoshop and get down and dirty with some editing. I'll show you how to readjust the lighting to refocus the viewer's eye, sharpen images, clean the skin, and make hair do far more than the image might show. Plenty of tricks and tips, but nothing really more fancy than every day tools in Photoshops. It's just how they are applied to make magic happen.
I don't keep anything a secret because I know that even if you tried to retouch an image I retouched before, they would come out totally different. Your mine and your eye are the most important editing tool. Your likes and dislikes will use the same tools I do and come up with totally different looks. And, since that's YOU coming through, this will be your style! Oh, it takes a while to get used to the tools but once you use them enough and apply them often enough to really know and 'feel' what they can do, your style will develop.
The best part about my classes is that they are one-on-one. It's just you and me kid. Unless you want to use the buddy system and share the class with a friend. That saves you some cash as well as having someone long who may remember things you don't and vice versa.

